Welcome to Documentation for Gramm WordPress Theme.
Hello, you are looking at the documentation for Gramm WordPress theme created by realtheme. Here you will learn how to setup the theme and customize it to fit your needs. Gramm is a modern Full Site Editing theme with several of useful custom Gutenberg block plugins.
This guide is designed for beginner users. If you come across something that isn't covered or is unclear, please visit the support tab on the Themeforest portal and submit your question.
Getting Started
After downloading the purchased ZIP archive from ThemeForest and unzipping it, you will find the following files:
- gramm.zip – main theme ZIP file (a fully installable theme ZIP package, including all required plugins).
- documentation – a link to the online documentation with installation instructions.
Installation
Steps to install the theme:
-
Login on your WordPress Admin Dashboard.
-
From dashboard sidebar select Appearance > Themes menu item.
-
Click Add Theme button.
-
Click the Upload Theme button, then click Choose File button.
-
In the dialog box that opens, select the previously downloaded gramm.zip archive and upload it. Once the upload is complete, click the Install Now button to install.
-
Now you can activate the theme you just installed by clicking Activate button.
-
After installing and activating the theme, you will see a notification box prompting you to install the required and recommended plugins. Proceed with the installation of the necessary plugins by clicking the "Begin installing plugins" link.
-
On Install Required Plugins page, select all the plugins, choose the "Install" option from the bulk actions dropdown, and click "Apply".
-
After successfully completing the plugin installation, click on "Return to Required Plugins Installer".
-
Once again, select all the plugins, choose the "Activate" option from the bulk actions dropdown, and click "Apply" to activate them.
-
The installer should confirm that the plugins have been successfully activated. You can now return to the Dashboard and proceed with installing the demo content. Instructions are provided in the next section.
For more info check https://wordpress.org/documentation/article/work-with-themes/
Here is a collection of helpful resources for learning about WordPress:
- WordPress Codex – a comprehensive guide with instructions on installing WordPress on your server.
- Getting Started with WordPress – an overview covering various essential topics for beginners.
- WordPress Beginner FAQ – answers to frequently asked questions for new WordPress users.
Required Plugins
Import Demo Content
The demo content installs all necessary pages required for the proper functioning of the theme, subscribe forms for MailChimp plugin, and demo post "Hello world!" that can be safely removed later.
If you choose to import the demo content, you can do so using the One Click Demo Import plugin by OCDI. Follow the plugin's instructions to complete the import.
Go to Appearance → Import Demo Data, click Import Demo Data, then click Continue & Import and wait until the import process is completed.
After you have confirmed that the theme is functioning correctly, you may safely remove the following demo content from your site:
-
The default "Hello world!" post.
Updating
To ensure a smooth theme update, it is essential to back up both your database and any modifications made to theme files. Following the update, you'll need to reapply any changes made to your files.
-
Go to Appearance > Themes > Add Theme.
-
Upload the ZIP file of the latest version of your Gramm theme from your computer. Click Upload Theme, then Choose File, locate the theme ZIP file on your computer, and finally click Install Now button.
-
Click Replace installed with uploaded button when prompted.
-
If prompted to update the RLT Gramm Blocks plugin after updating the theme, please update it to the latest version.
-
Please wait for the process to finish.
Site Settings
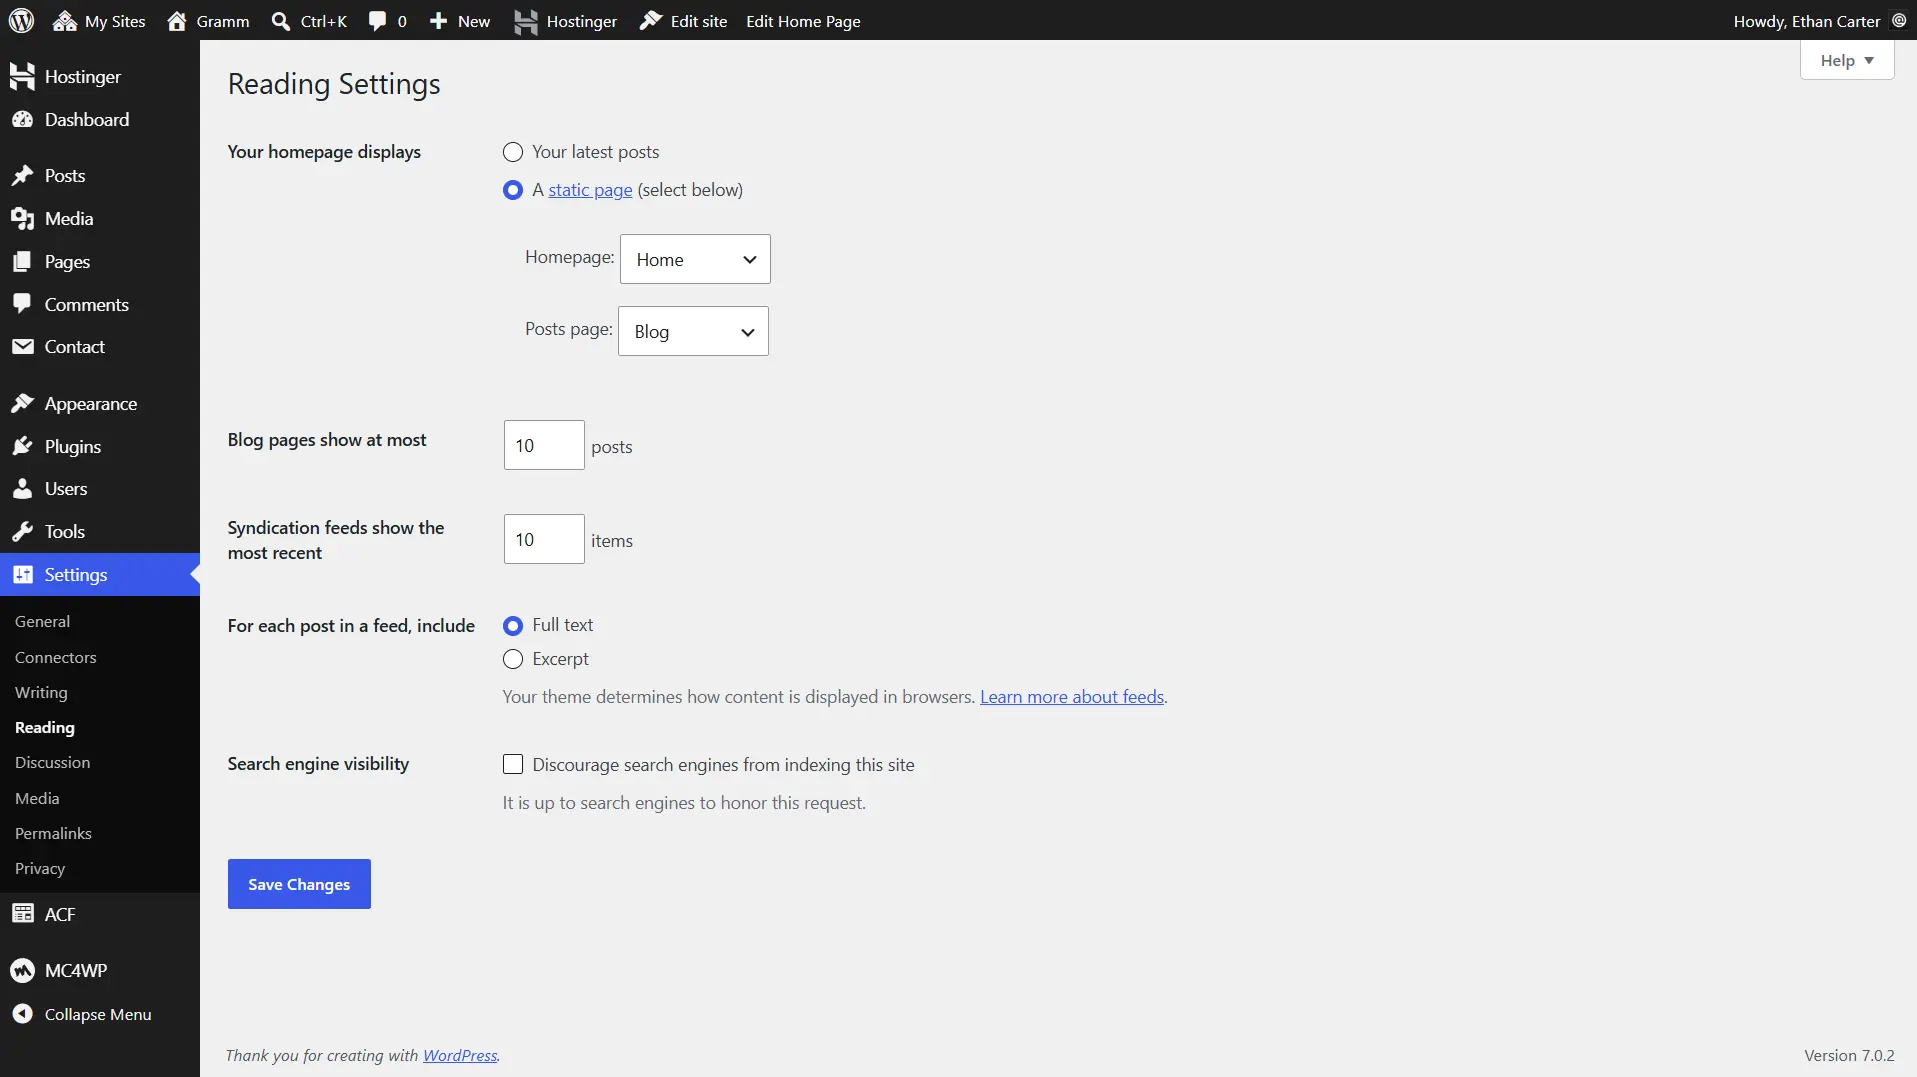
To configure your site's homepage and posts page, navigate to Settings → Reading. Under Your homepage displays, select A static page (select below). Then set Homepage to Home or Home Two and Posts page to Blog. Finally, click Save Changes to apply the settings (see Picture 1).
The main difference between Home and Home Two is how posts are displayed on the homepage. The Home template uses standard pagination, while Home Two loads additional posts using either a Load More button or Infinite Scroll behavior.
Regenerate Thumbnails
The Gramm theme includes custom thumbnail sizes (post image sizes), so you may need to regenerate thumbnails to ensure proper display of post images. I recommend using the Force Regenerate Thumbnails plugin from the WordPress Plugin Directory for this task. For details, refer to the usage instructions on the plugin page.
Customization
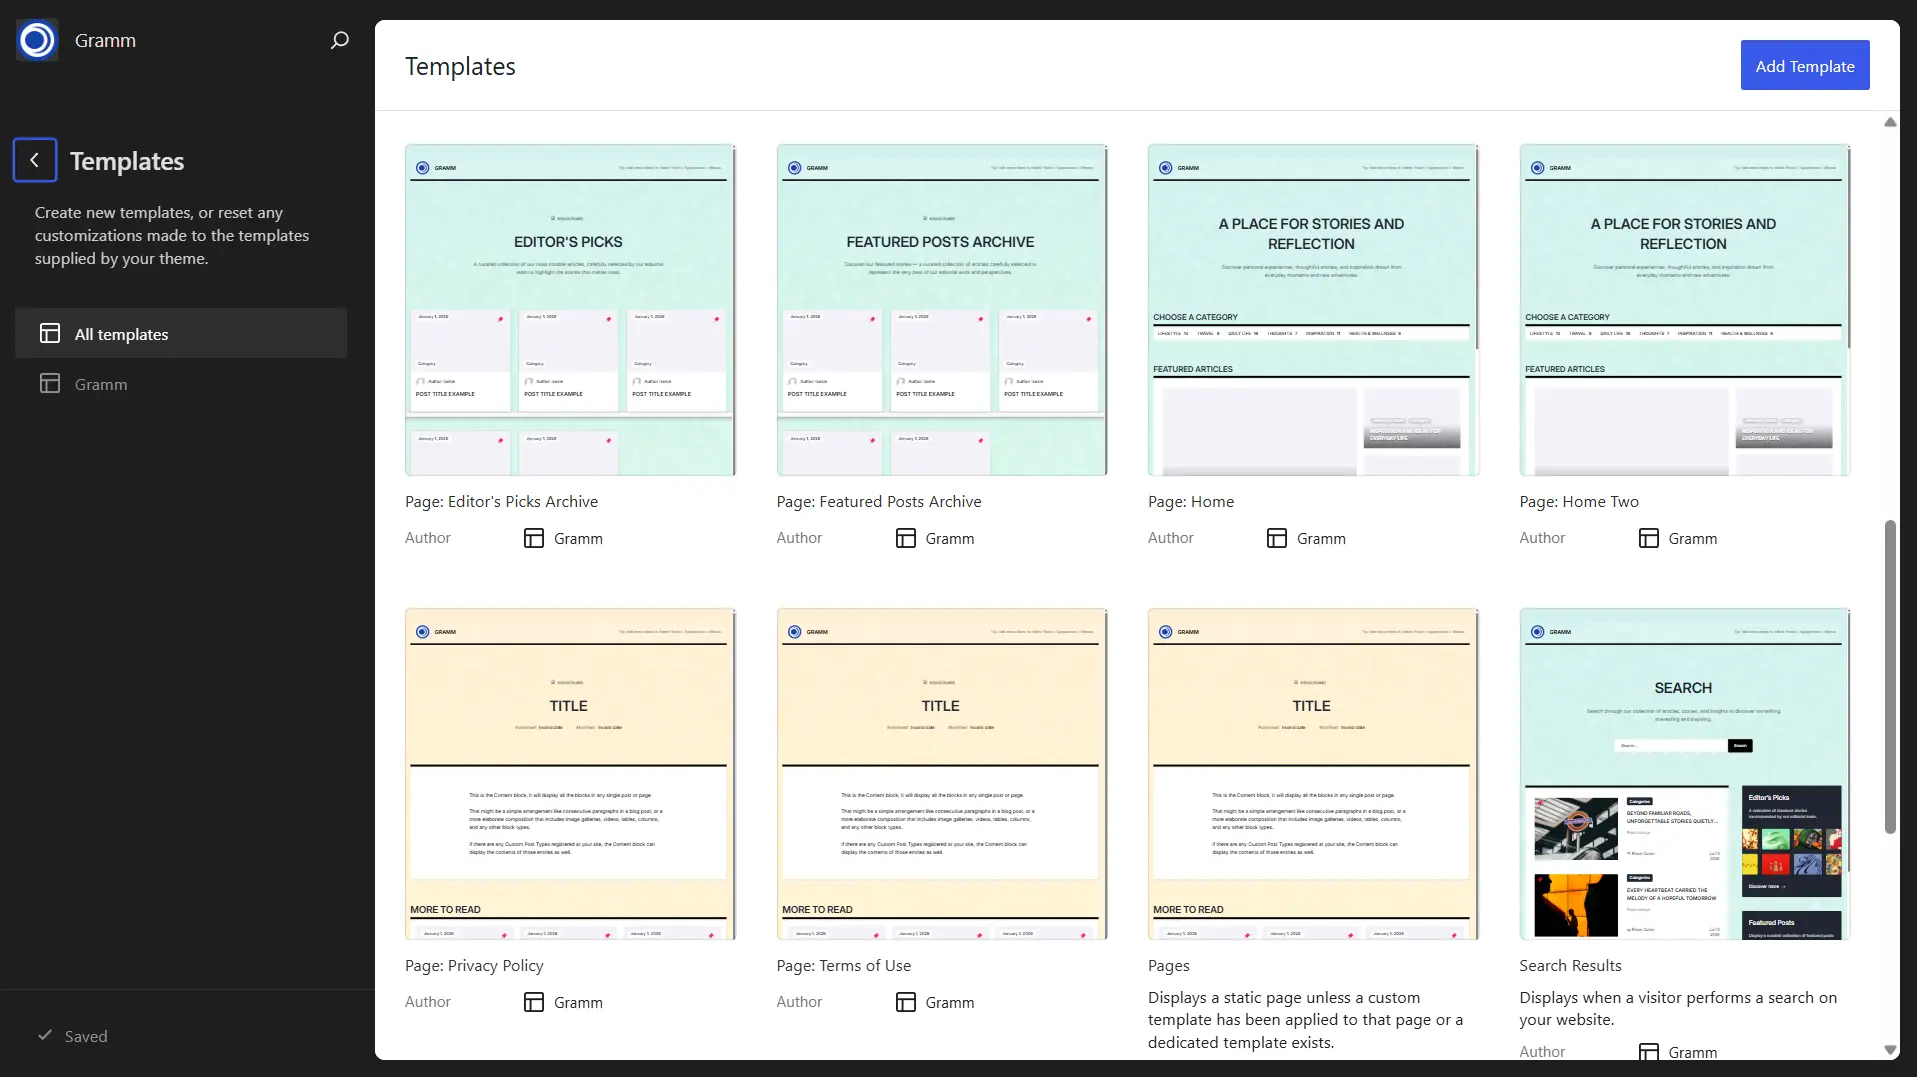
To start customizing the theme, go to Appearance → Editor. In the Site Editor, select Templates from the left sidebar. On the Templates screen, choose the template you want to customize, such as Page: Home, and begin editing it using the WordPress Site Editor.
By default, the theme includes a complete set of WordPress templates that you can customize using the Site Editor. Depending on your site's configuration, the following templates are available for editing (see Picture 1):
- All Archives
- Author Archives
- Blog Home
- Category Archives
- Index
- Page: 404
- Page: About Us
- Page: Contact
- Page: Editor's Picks Archive
- Page: Featured Posts Archive
- Page: Home
- Page: Home Two
- Page: Privacy Policy
- Page: Terms of Use
- Pages
- Search Results
- Single Posts
- Tag Archives
WordPress Editor Explained
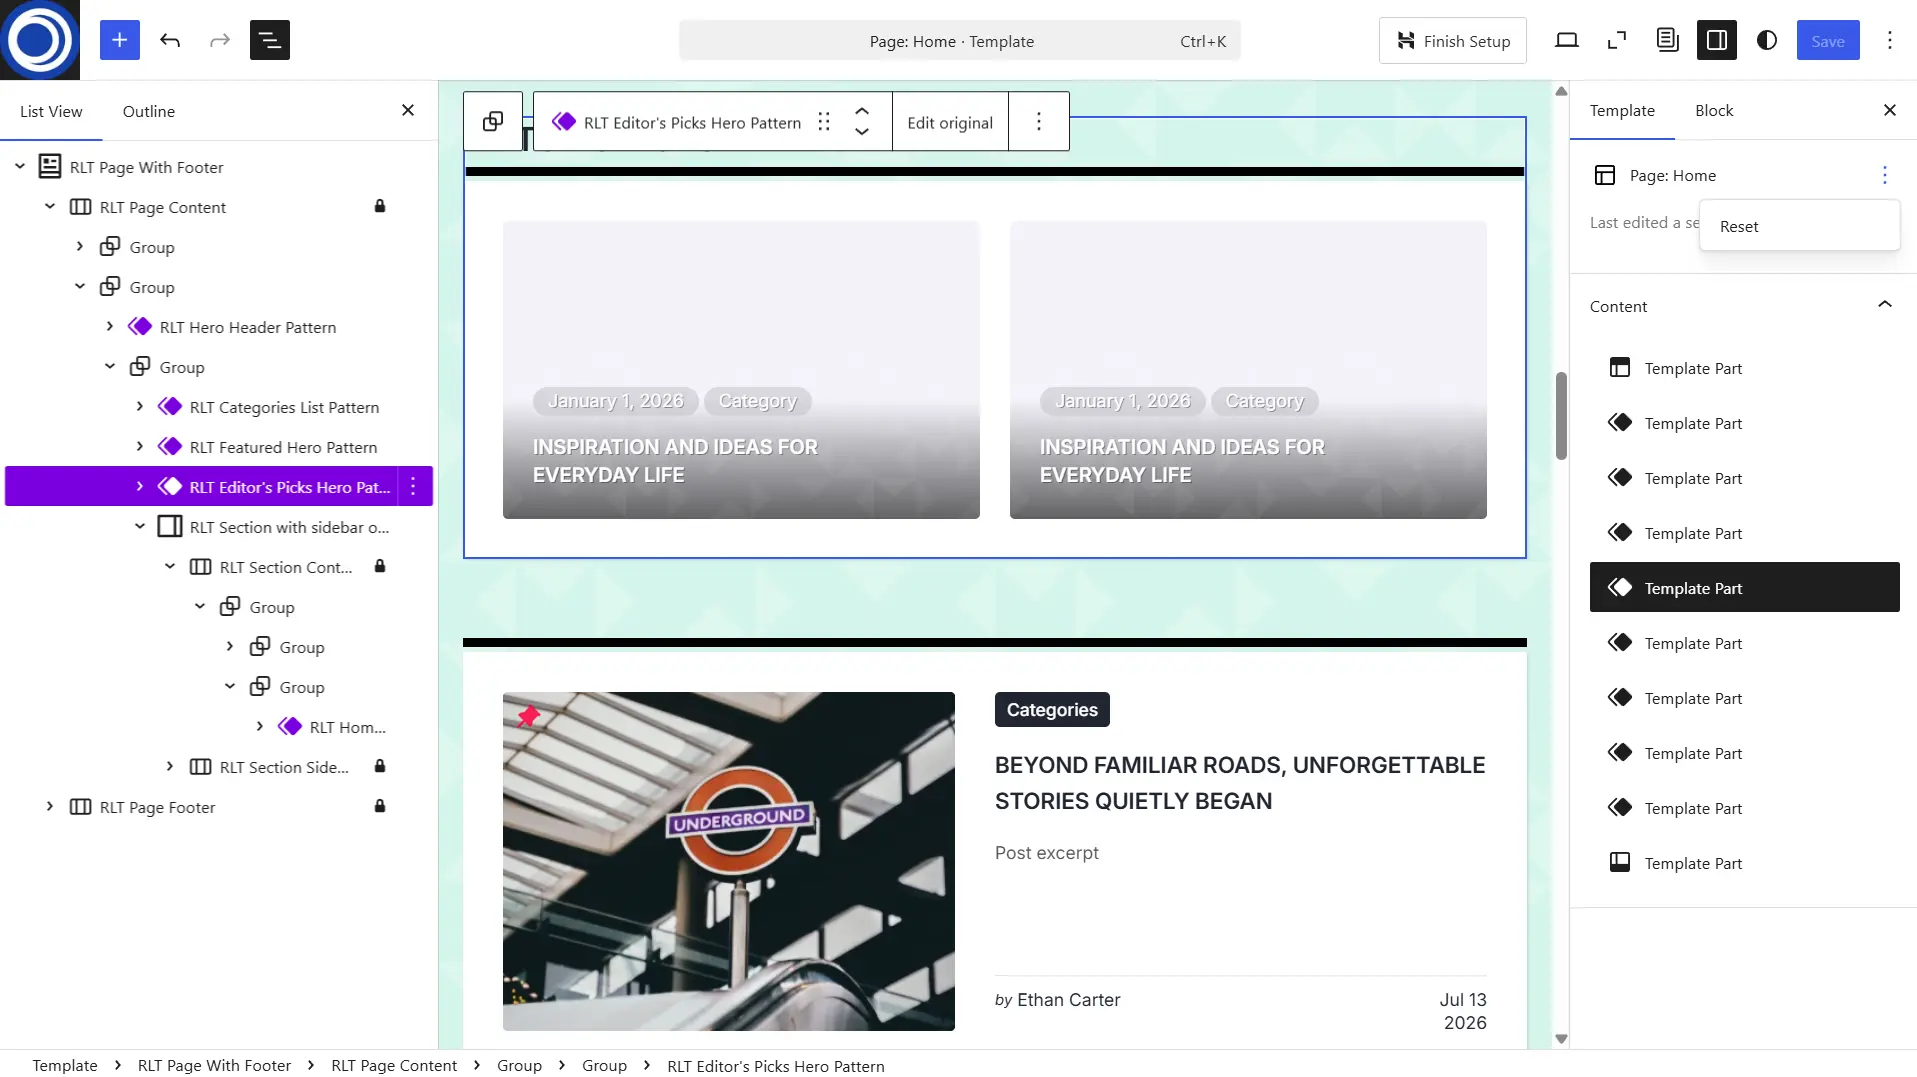
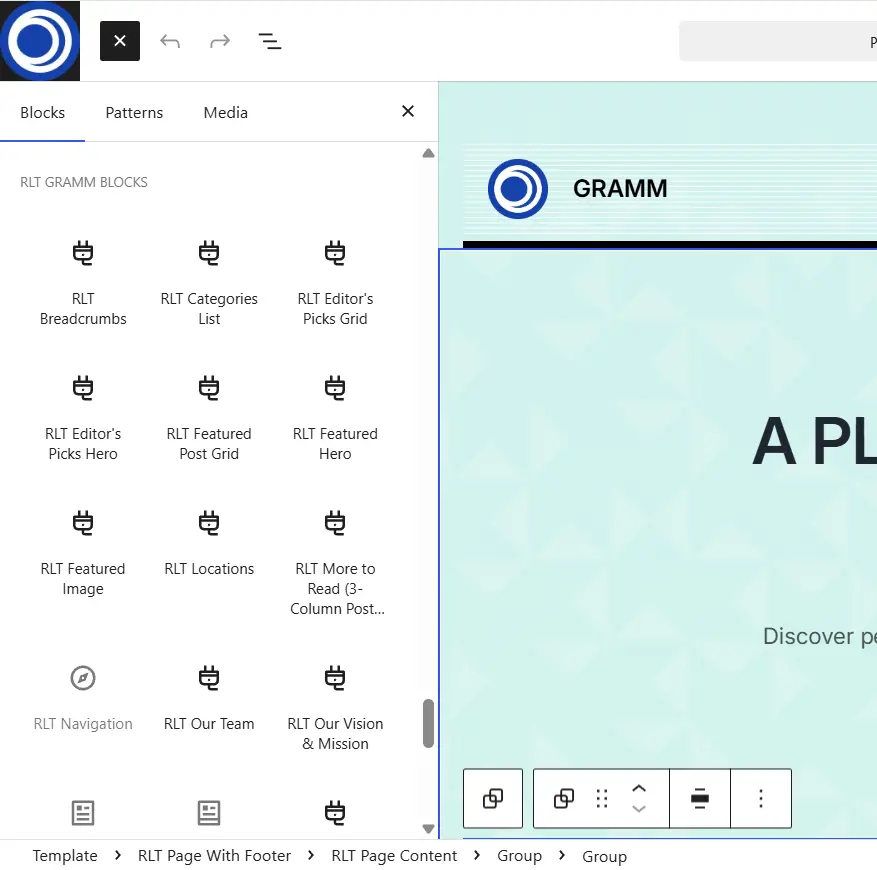
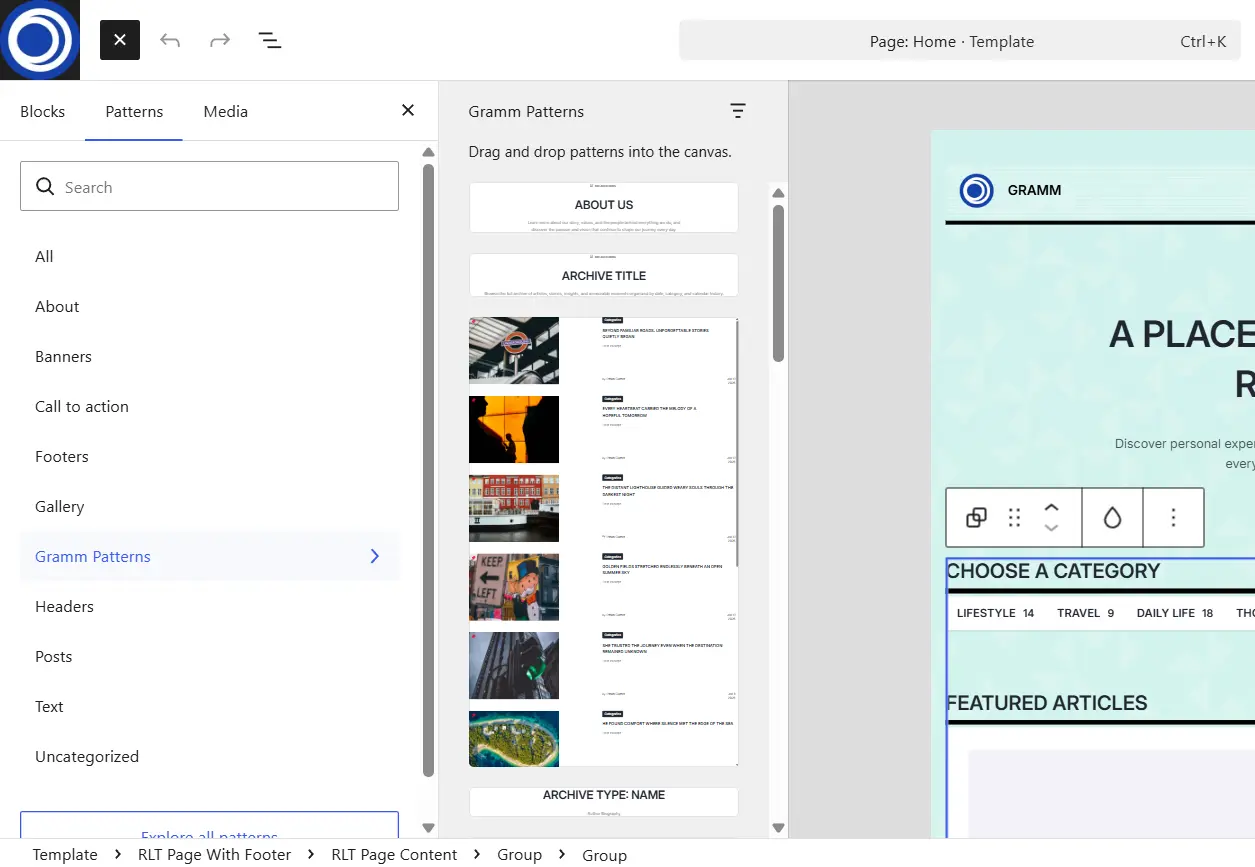
The Gramm theme includes the RLT Gramm Blocks plugin, which provides a collection of custom Gutenberg blocks designed specifically for the theme. These blocks allow you to build pages and customize layouts while maintaining a consistent design and making full use of the theme's features. In addition to the standard WordPress blocks, you will find a dedicated RLT Gramm Blocks category in the block inserter, containing all custom blocks available with the theme (see Picture 4). The theme also includes a collection of pre-designed patterns available under the Gramm Patterns category (see Picture 5).
To learn more about blocks and how to use them with the Editor, please refer to the official WordPress documentation.
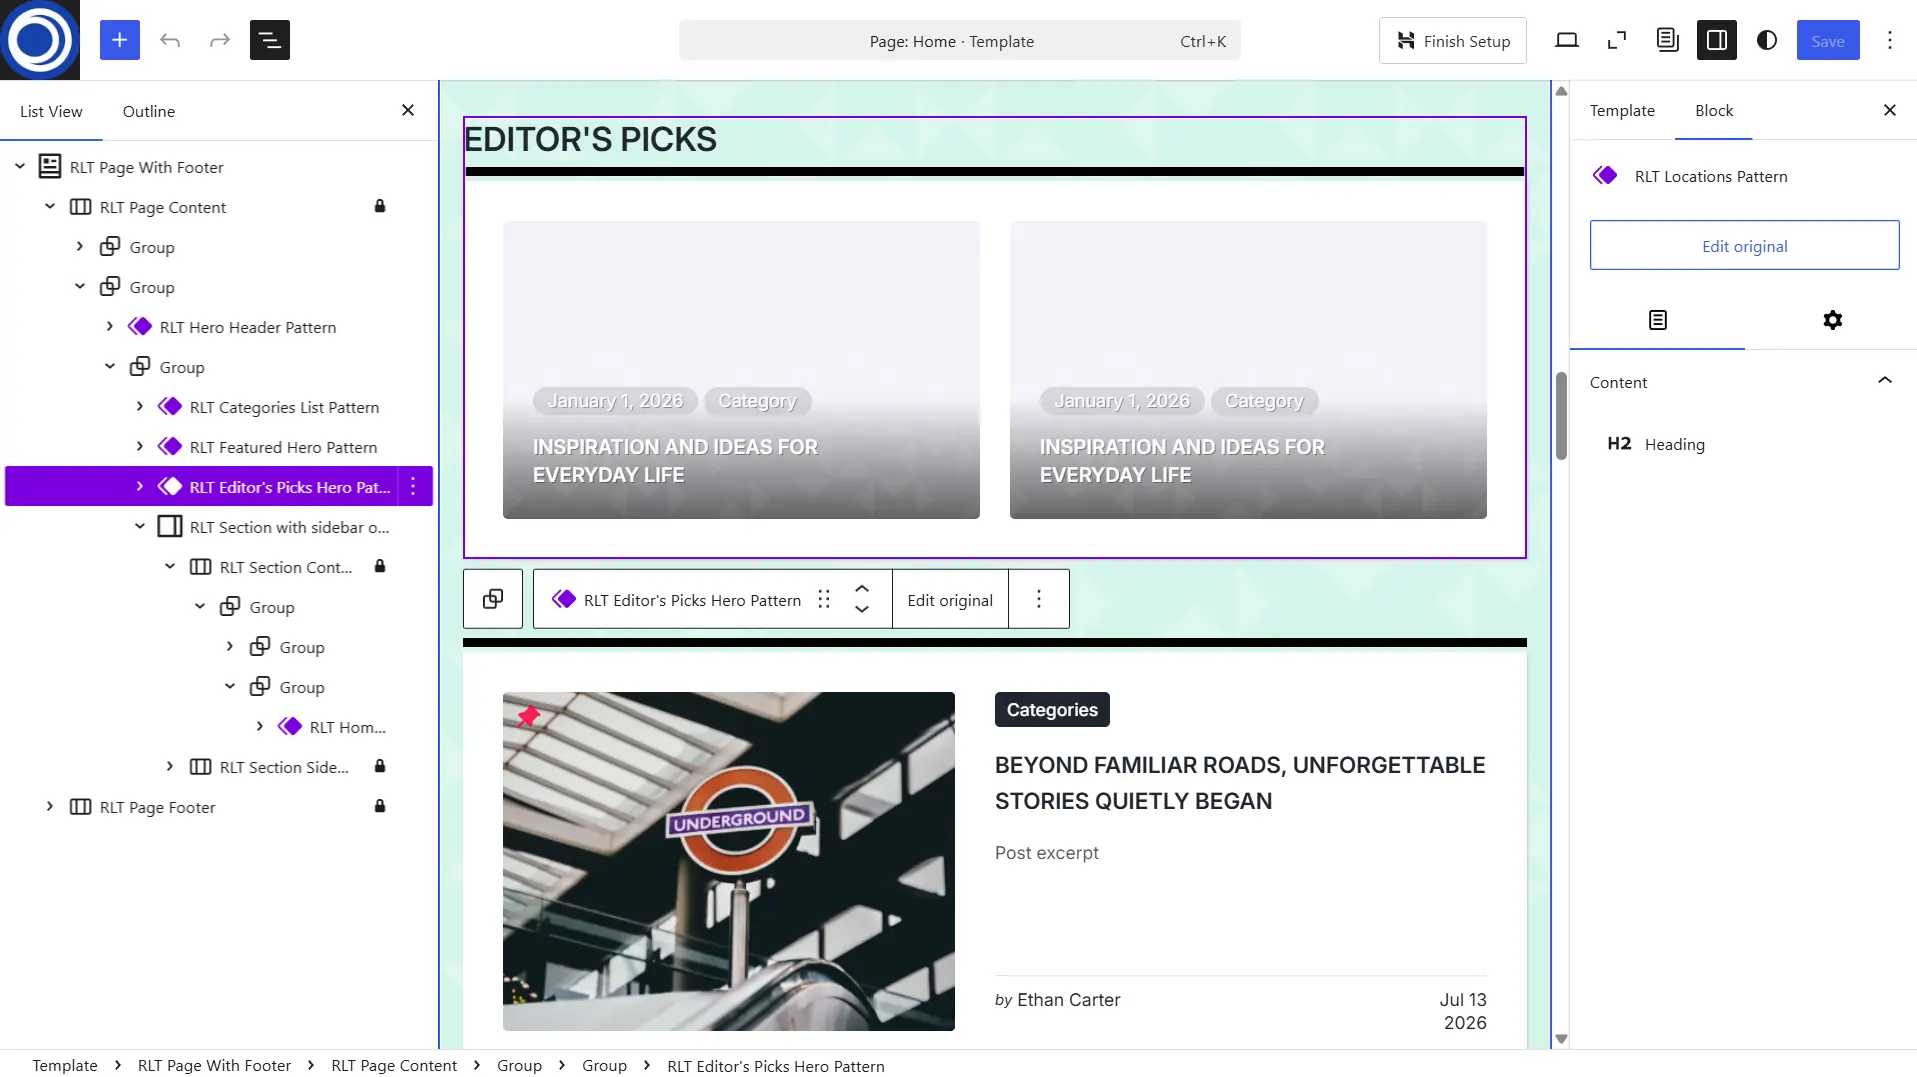
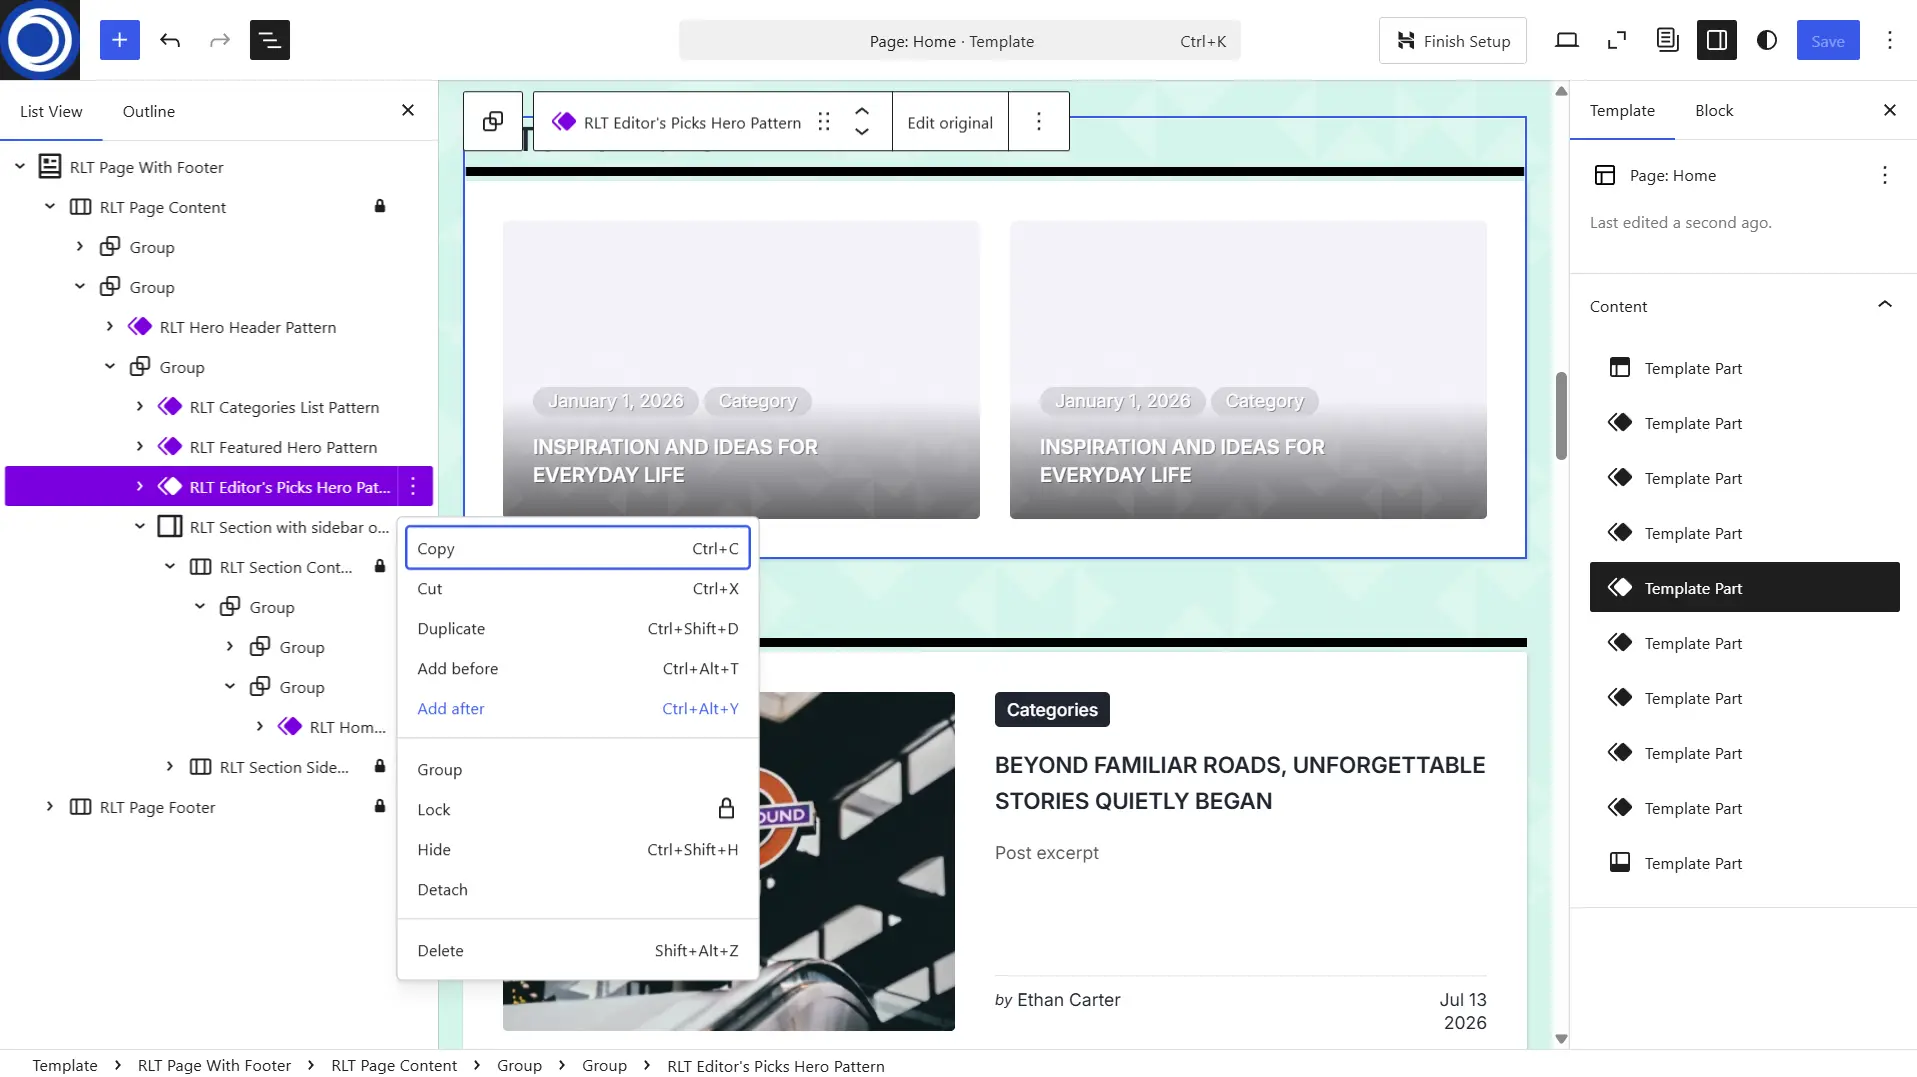
The Site Editor interface consists of three main areas. The left sidebar displays the hierarchy of all blocks on the current page or template, making it easy to select and navigate between nested blocks. The center area provides a visual preview of the page or template where you can arrange and edit blocks. The right sidebar contains the settings panel for the currently selected block, allowing you to customize its appearance, layout, spacing, typography, colors, and other available options. (see Picture 1)
Content Container (Group Block)
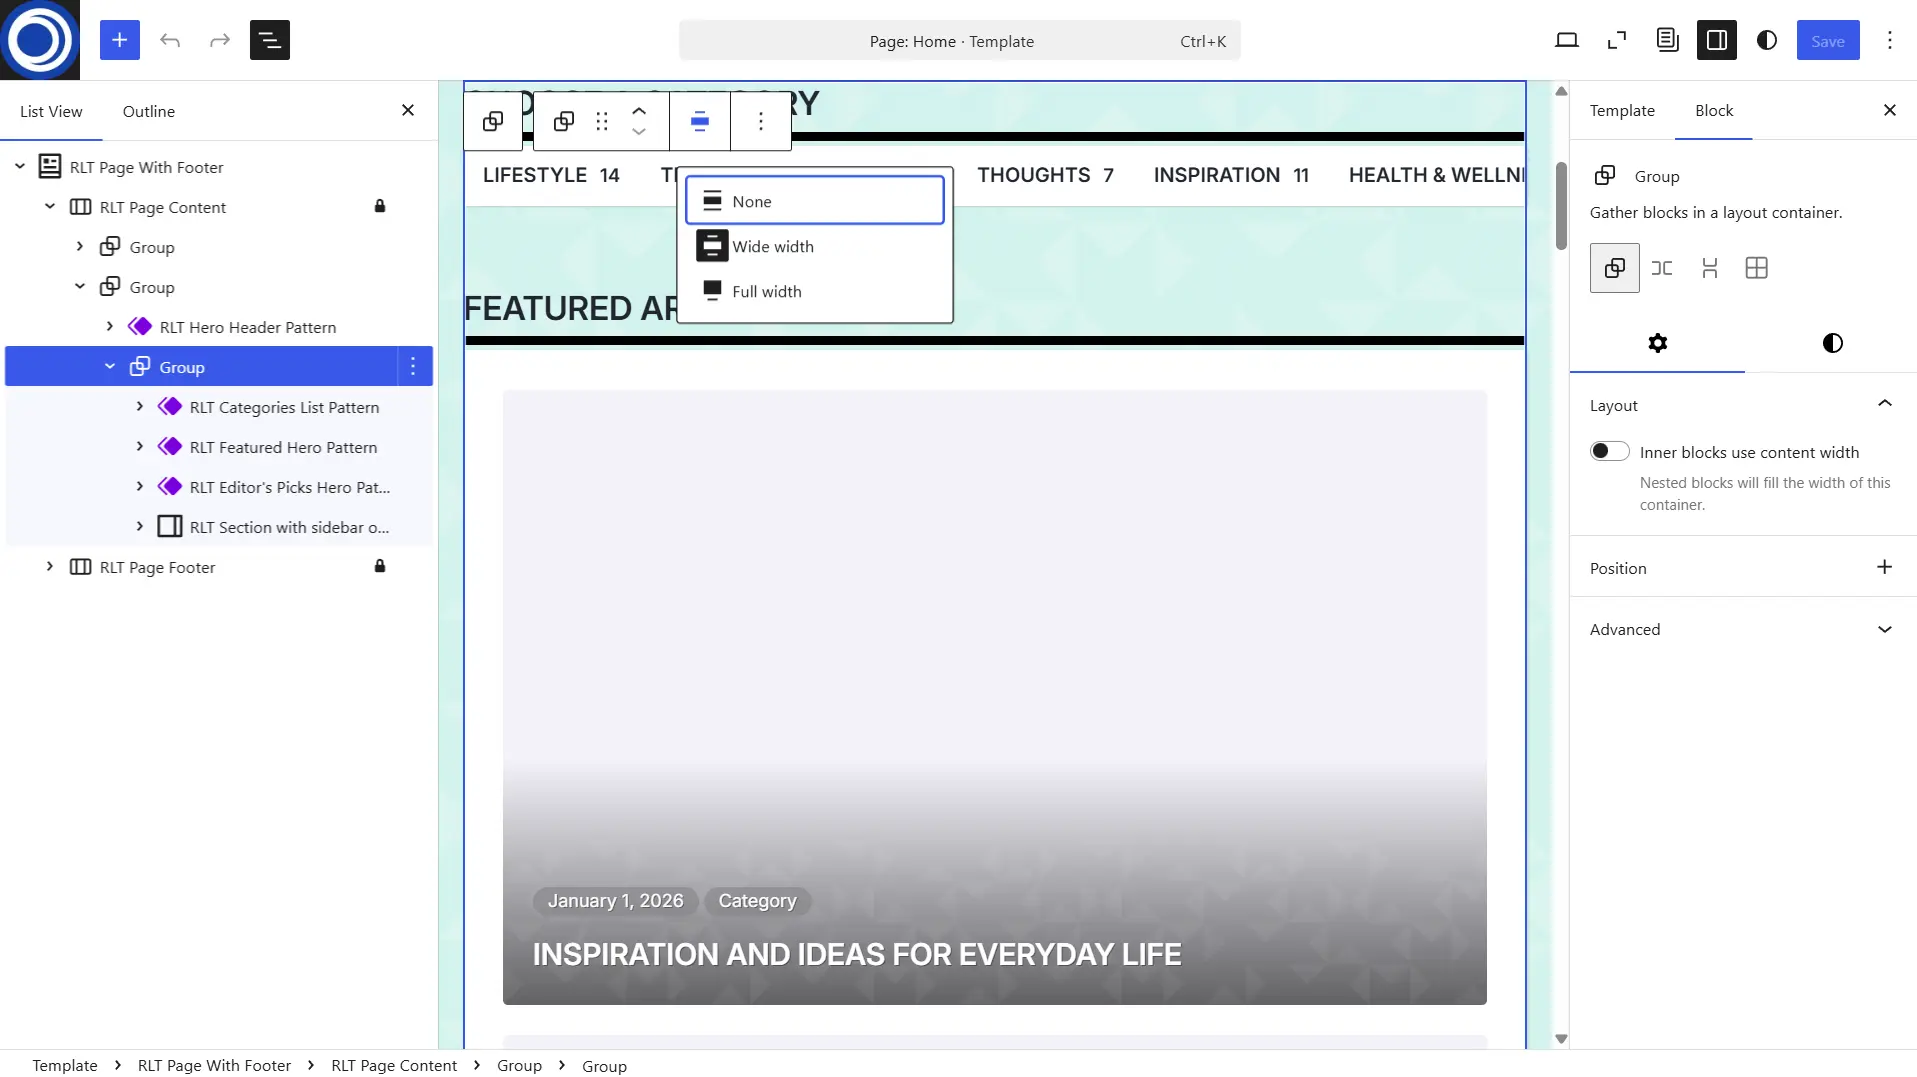
WordPress does not include a dedicated Container block. To create a content container, insert a Group block and place another Group block inside it. In the inner Group block settings, disable the Inner blocks use content width option. Finally, with the same inner Group block selected, click the Align icon in the block toolbar and choose the Wide width option. This creates a flexible container suitable for building custom page layouts.
Changing Global Styles (Fonts, Color Palette)
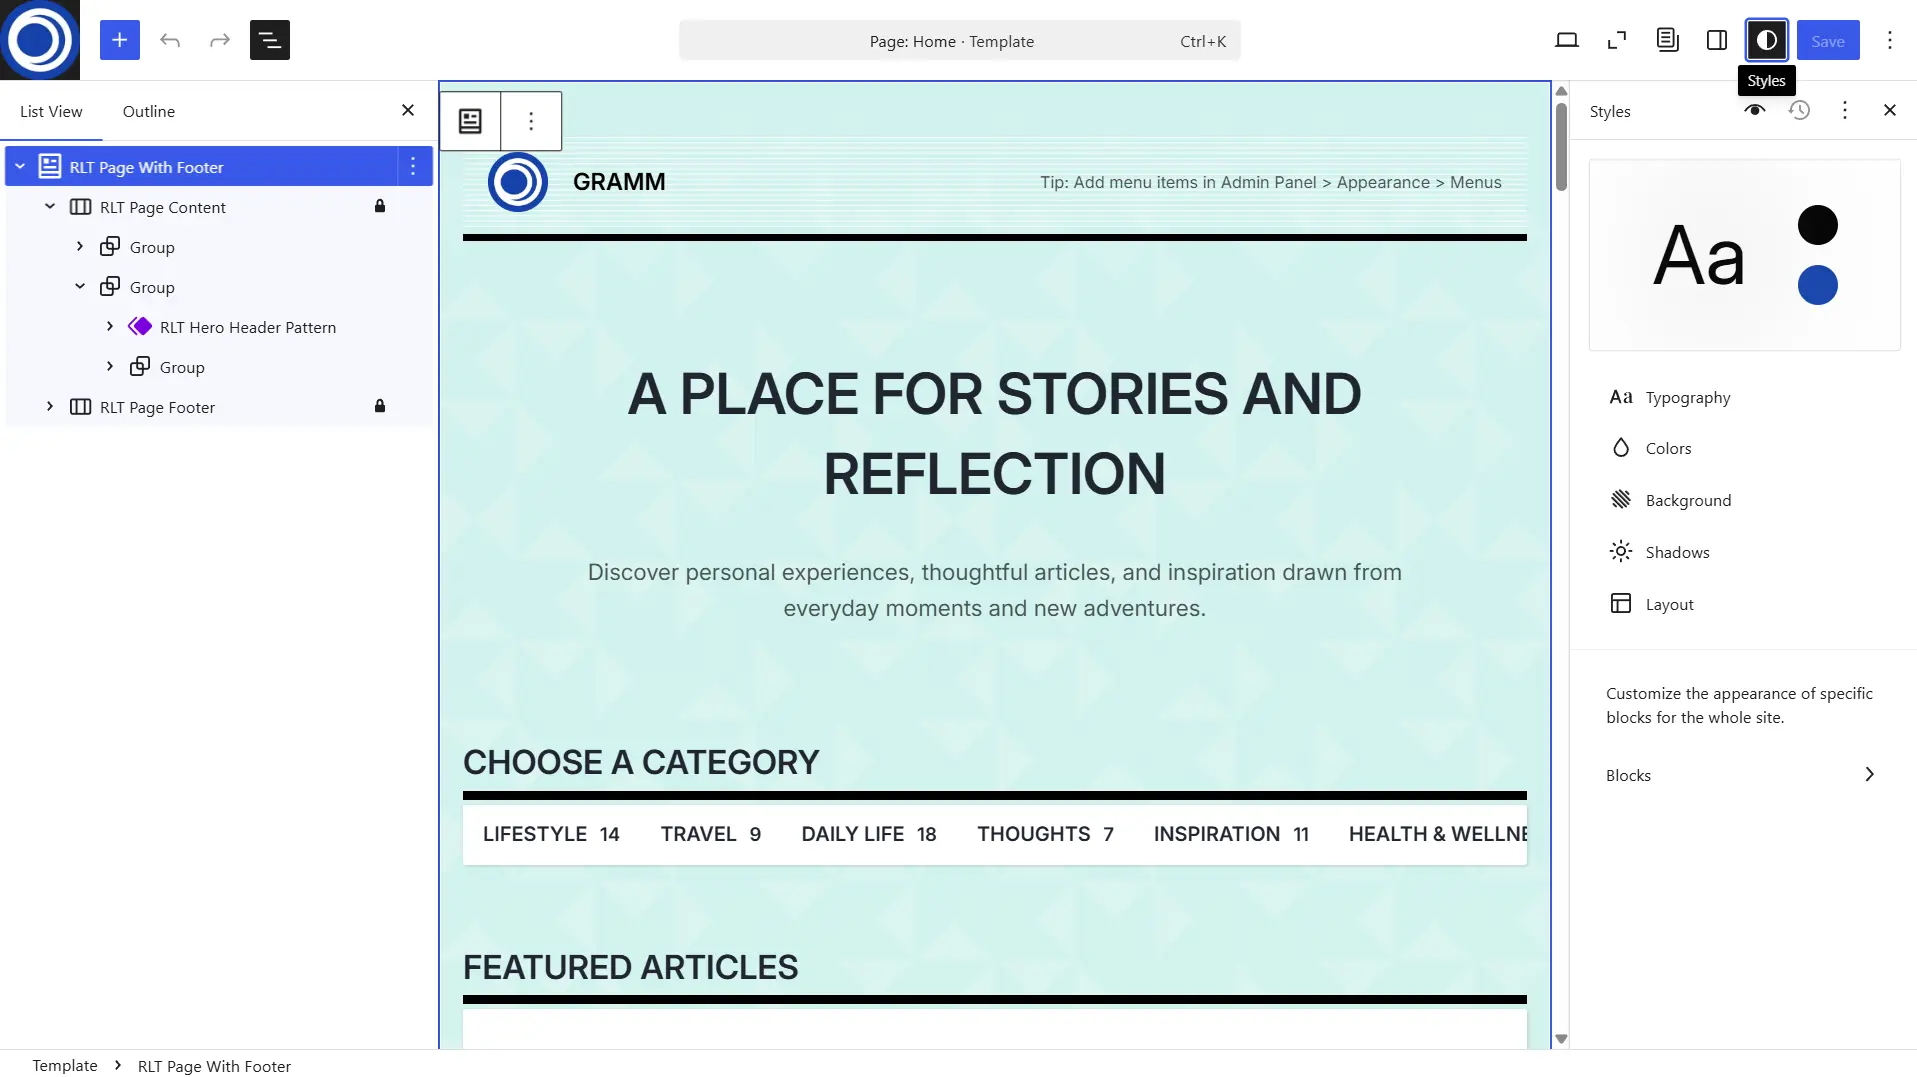
Using the native customization features of modern WordPress, you can modify various aspects of your site's appearance either globally or for individual blocks. For example, you can upload your own WOFF2 font files and apply them to headings or body text, customize the global color palette, adjust typography, spacing, and layout settings, and create a unique visual style without editing any code. These options are available through the Styles panel in the WordPress Site Editor.
Changing Background Color (RLT Page Block)
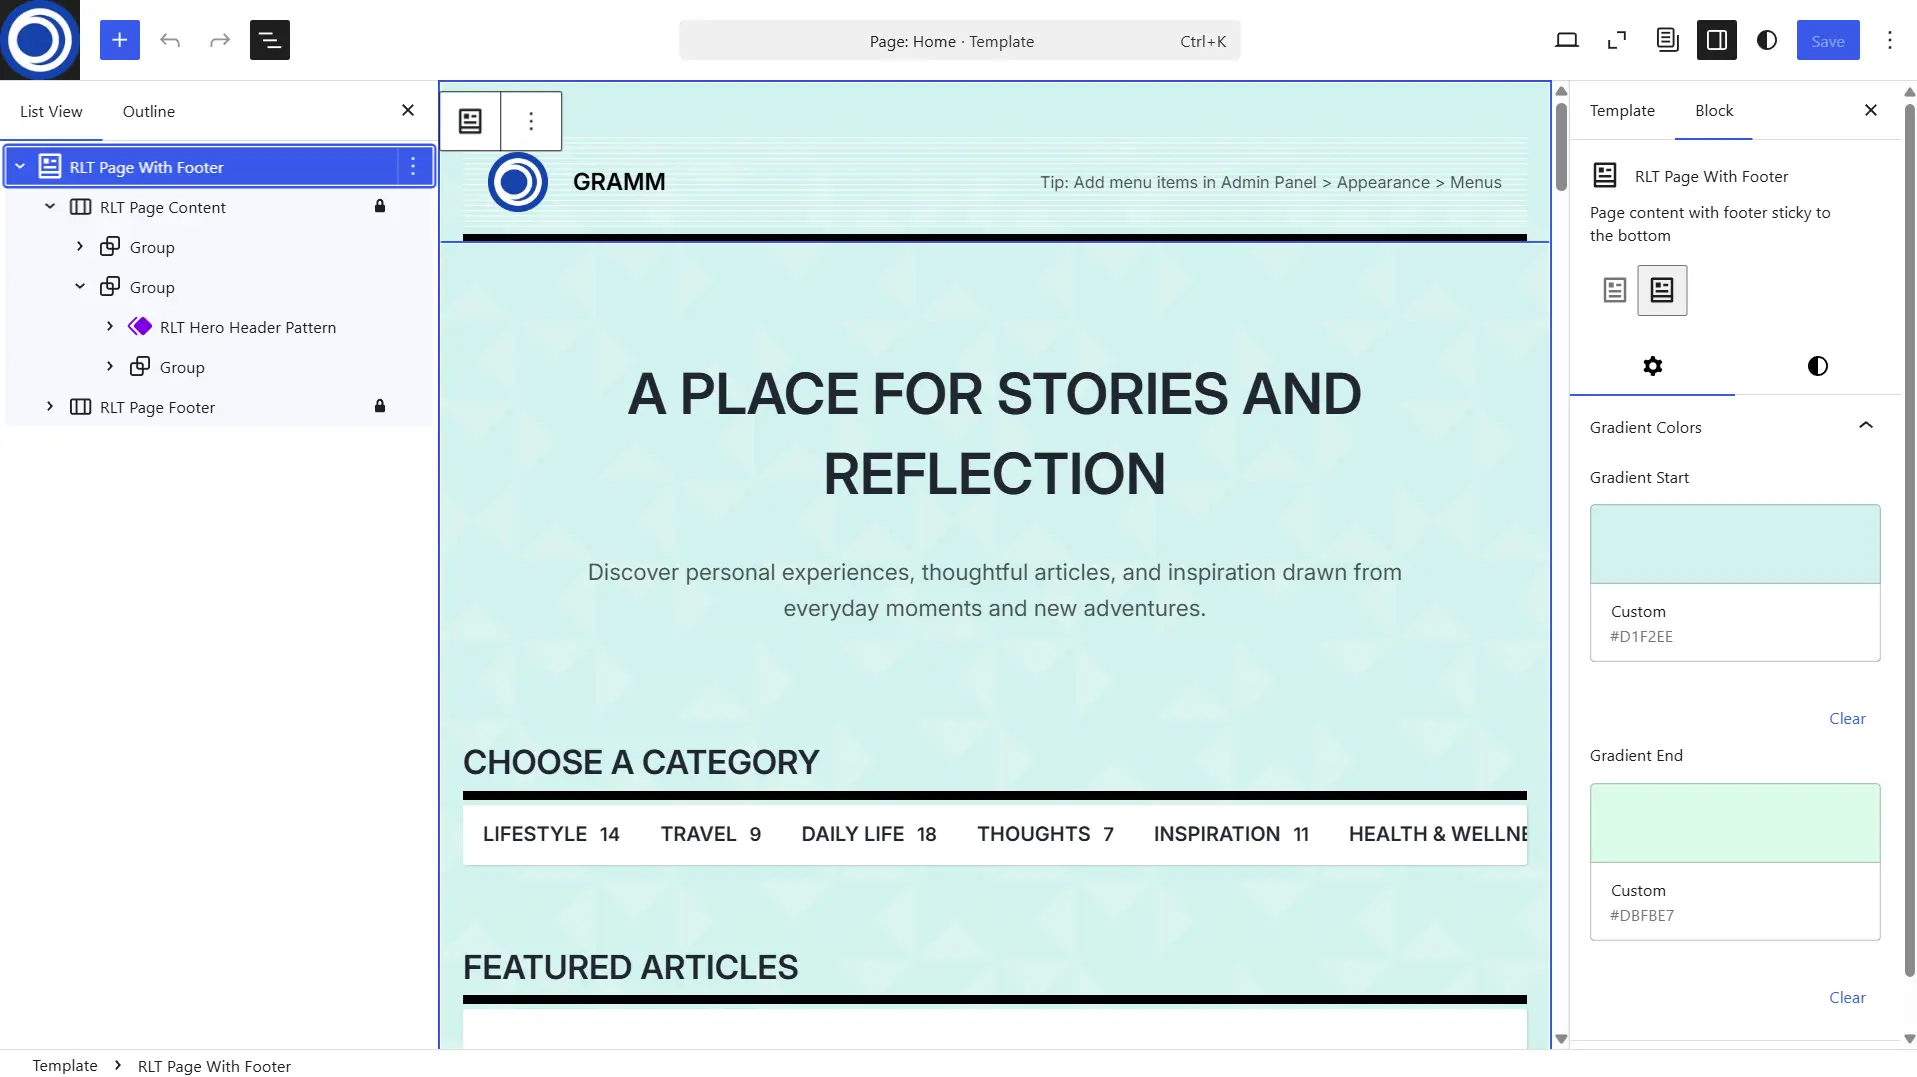
The Gramm theme includes two page wrapper blocks: RLT Page With Footer and RLT Page Without Footer. These blocks serve as the outer container for all inner blocks within your page template. They are responsible for displaying the theme's gradient background with a decorative pattern, keeping the footer pinned to the bottom of the viewport on pages with little content, and enabling the Scroll to Top button displayed in the bottom-right corner of the screen. You can customize the background by selecting your own gradient colors or choose from the predefined gradient presets included with the theme on the Block Styles tab.
Site Logo, Title and Navigation (RLT Header Pattern)
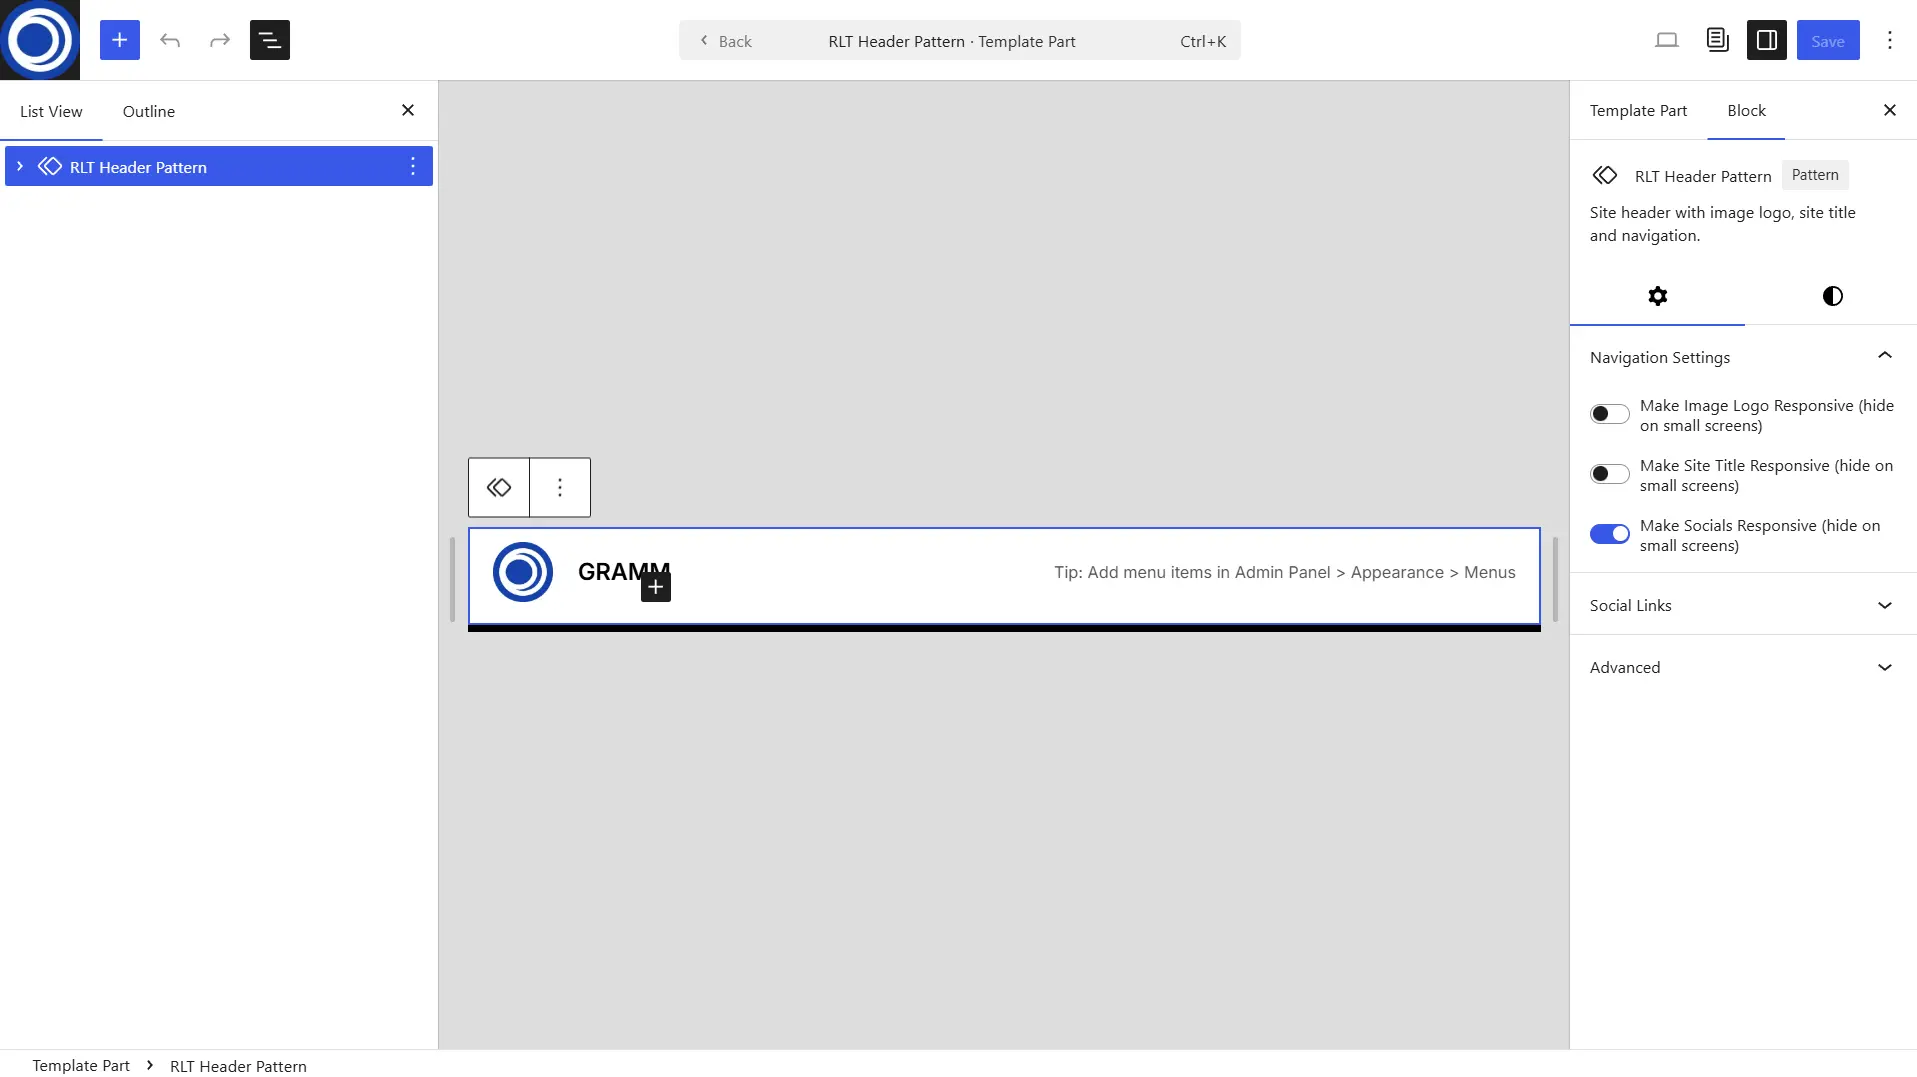
All page templates include the RLT Header Pattern, which contains the RLT Navigation block with settings for the site logo, site title, navigation menu, and social media links. To customize the header, open any page template in the Site Editor, select the RLT Header Pattern, and choose Edit original. In the pattern editor, upload your site logo and configure the RLT Navigation block as needed. When you are finished, click Save to apply the changes across all templates that use this pattern.
Site Footer
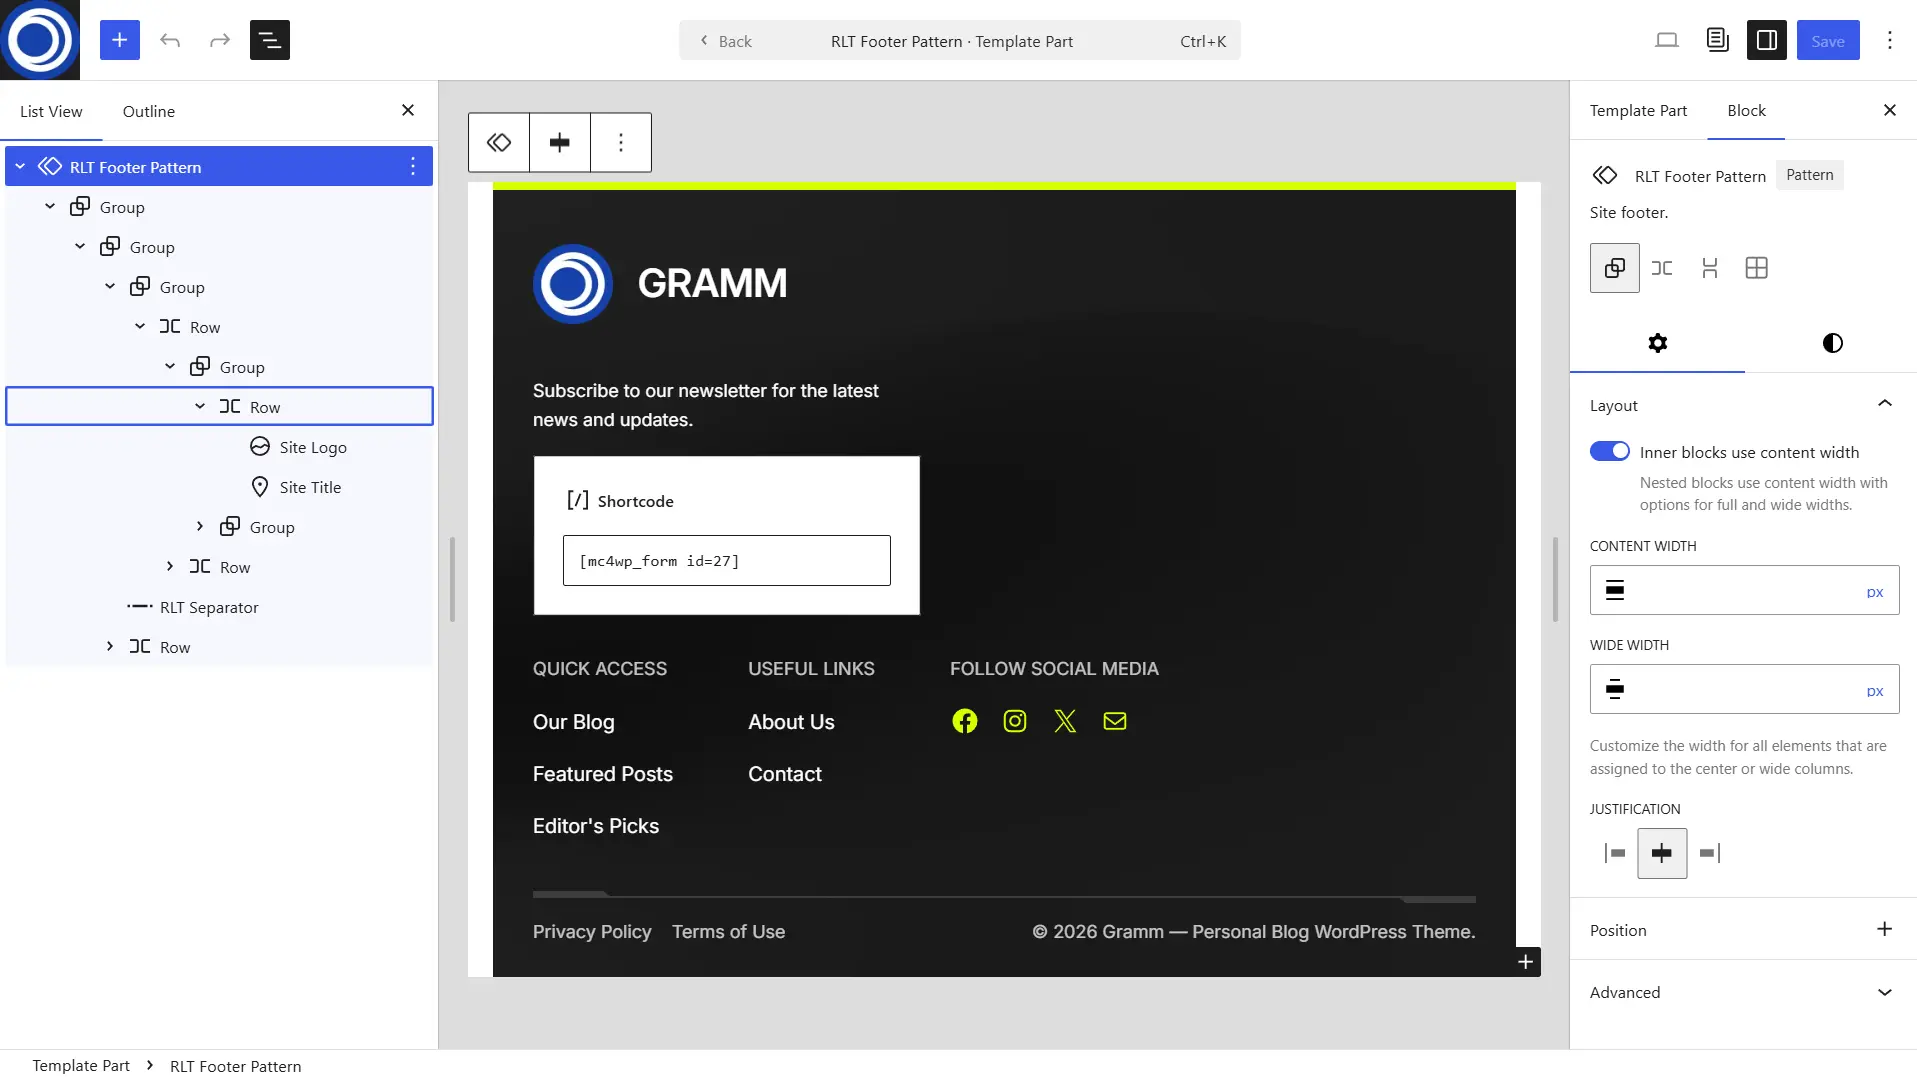
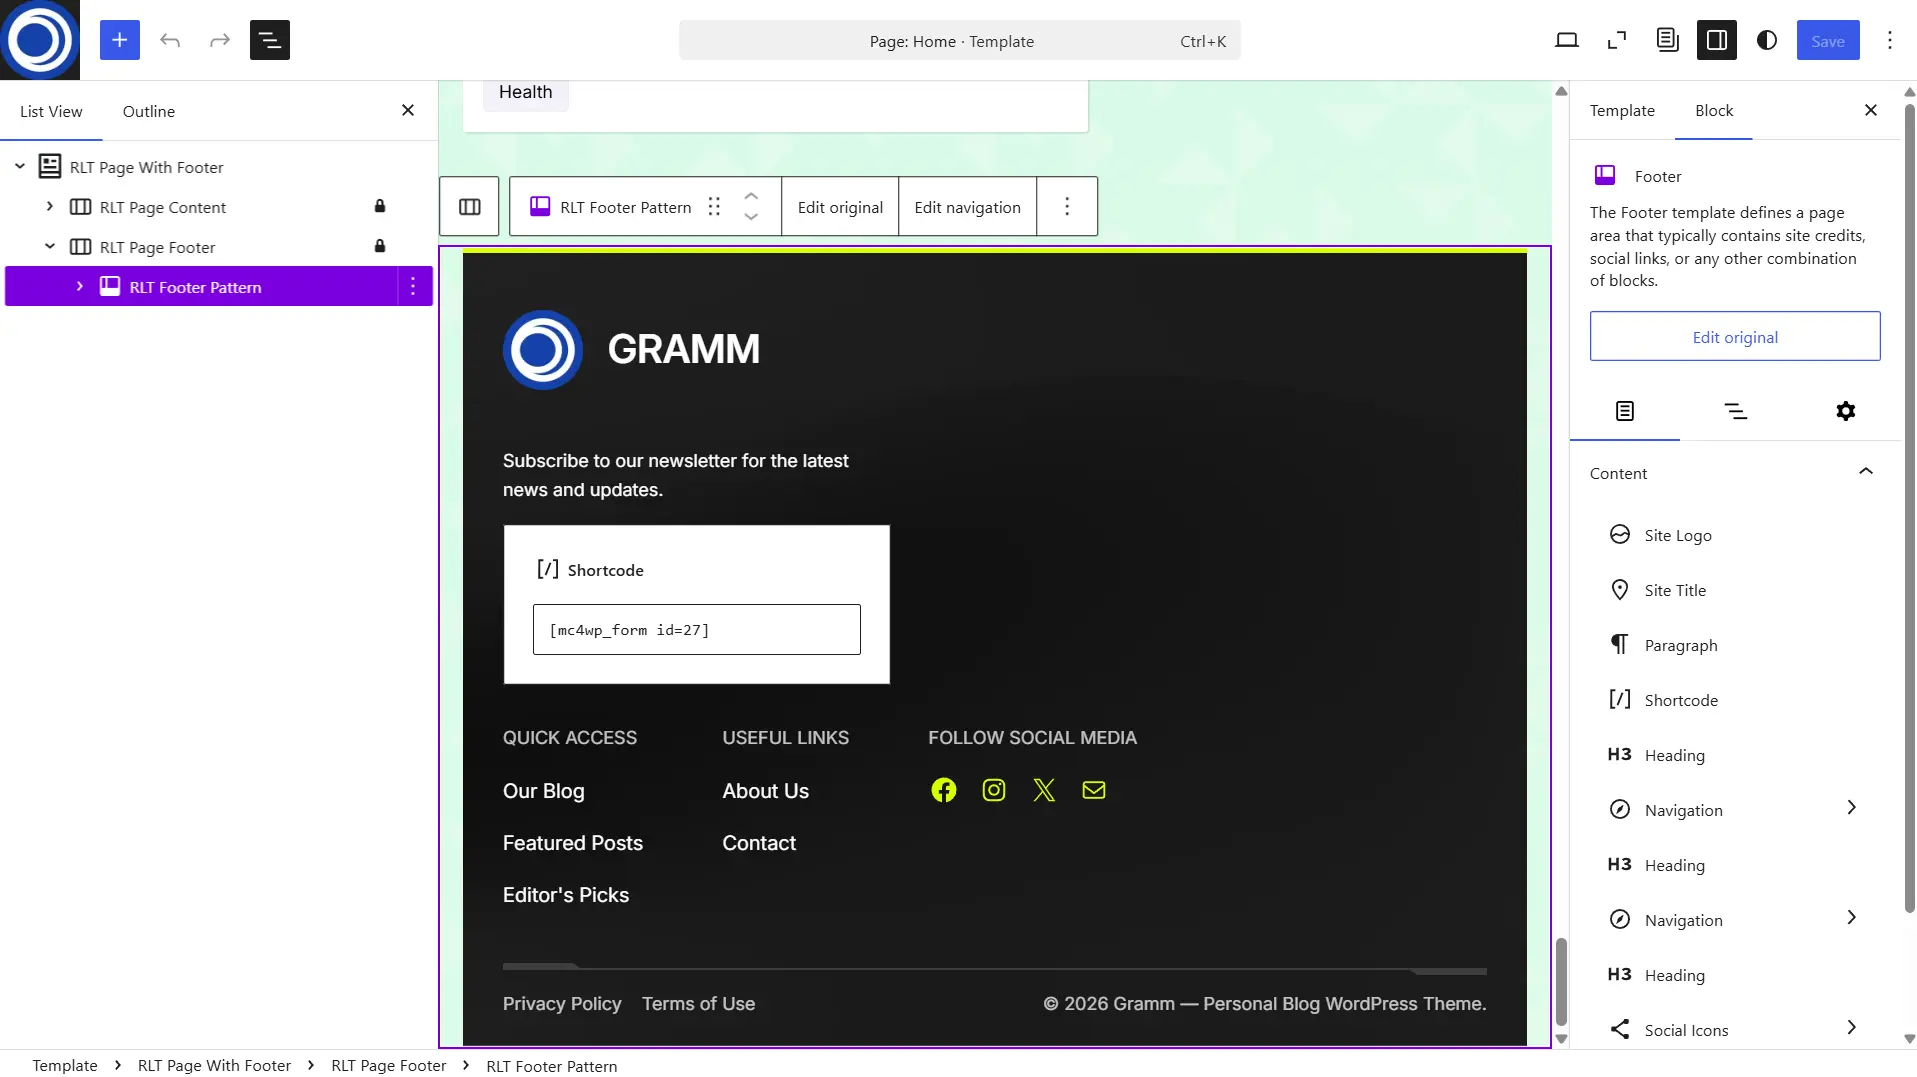
The footer is provided by the RLT Footer Pattern, which is used as an inner block of the RLT Page With Footer block. To customize the footer, open any page template in the Site Editor, select the RLT Footer Pattern, and choose Edit original. In the pattern editor, you can modify or remove the footer navigation menu, edit or remove the Mailchimp subscription form shortcode, customize the social links block, and make any other changes to the footer content. When you are finished, click Save to apply the changes across all templates that use this pattern.
Featured Posts and Editor's Picks
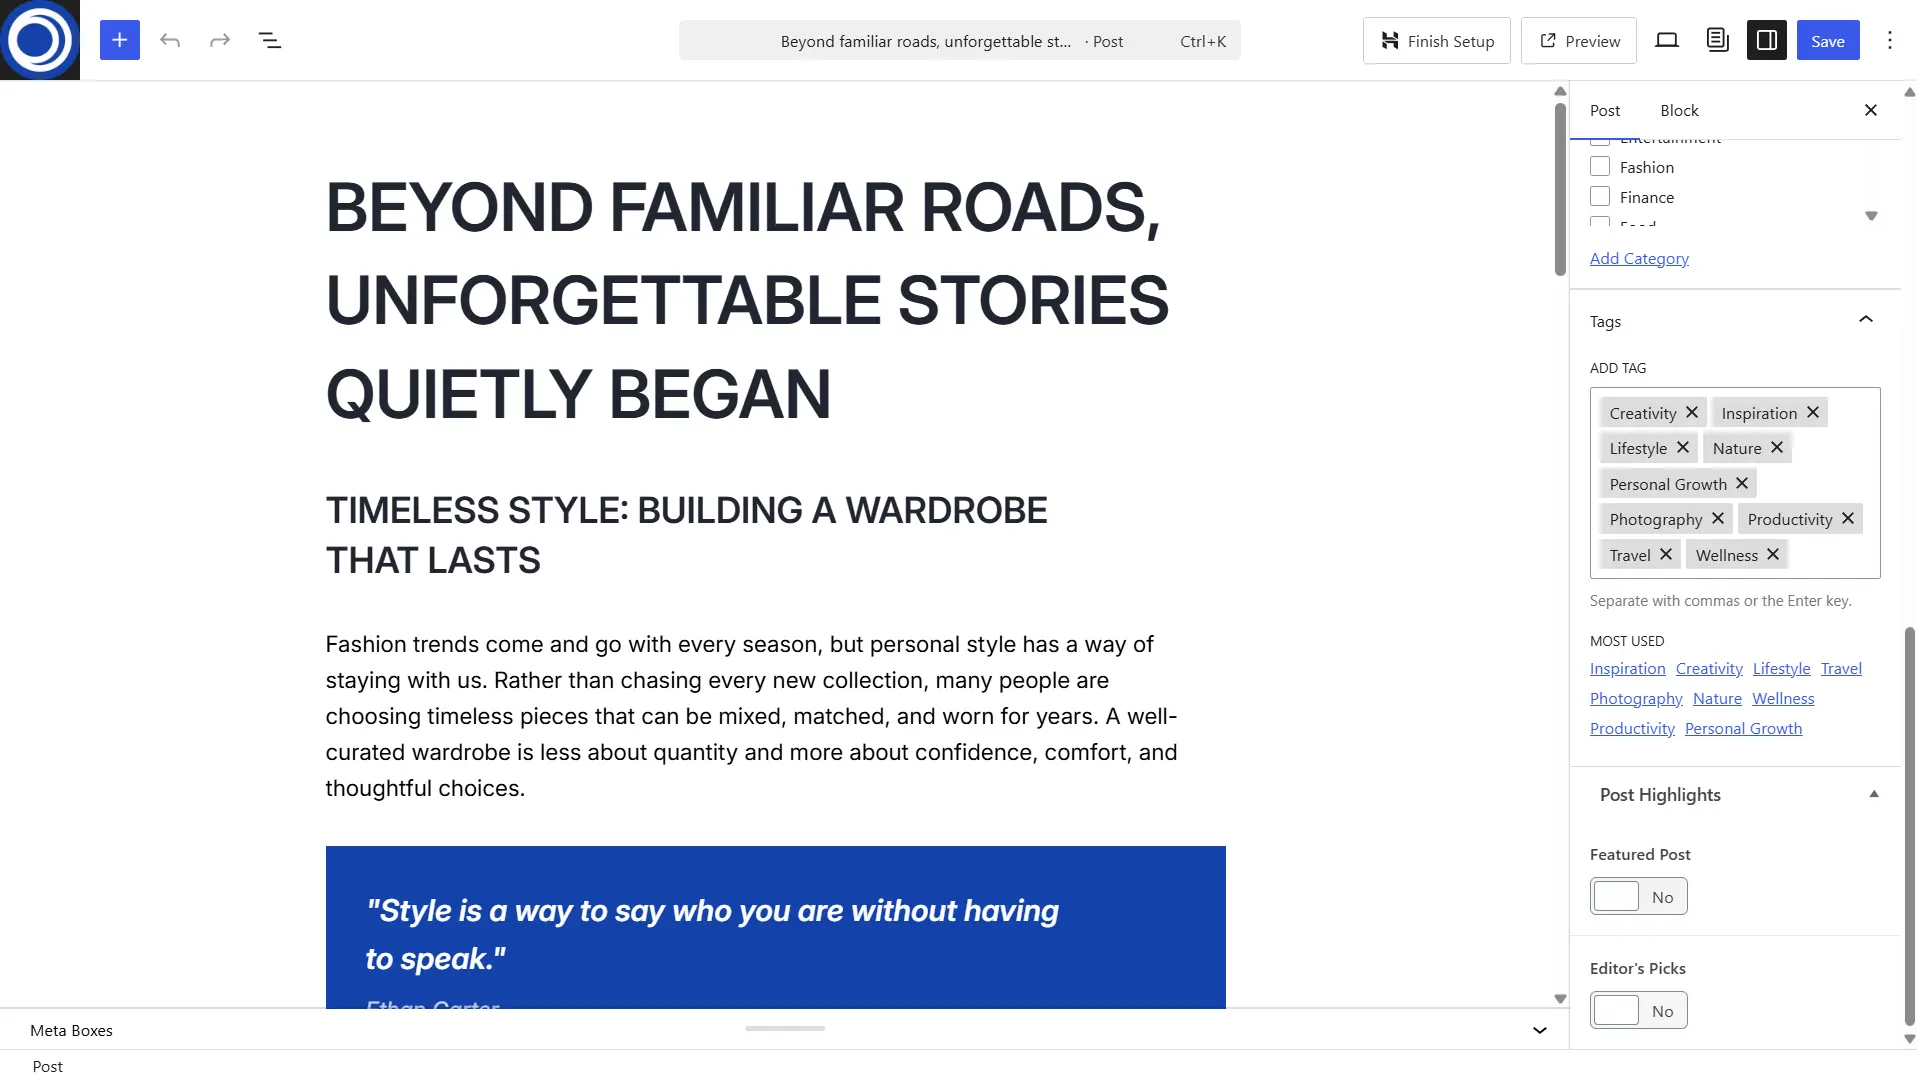
The homepage displays Featured Posts and Editor's Picks sections. To populate these sections, edit the posts you want to feature and enable the corresponding Featured Post or Editor's Pick toggle in the post settings. Once enabled, the posts will automatically be included in the appropriate query and displayed in their respective sections on the homepage. The latest published posts are displayed first.
Changing Main Query Loop
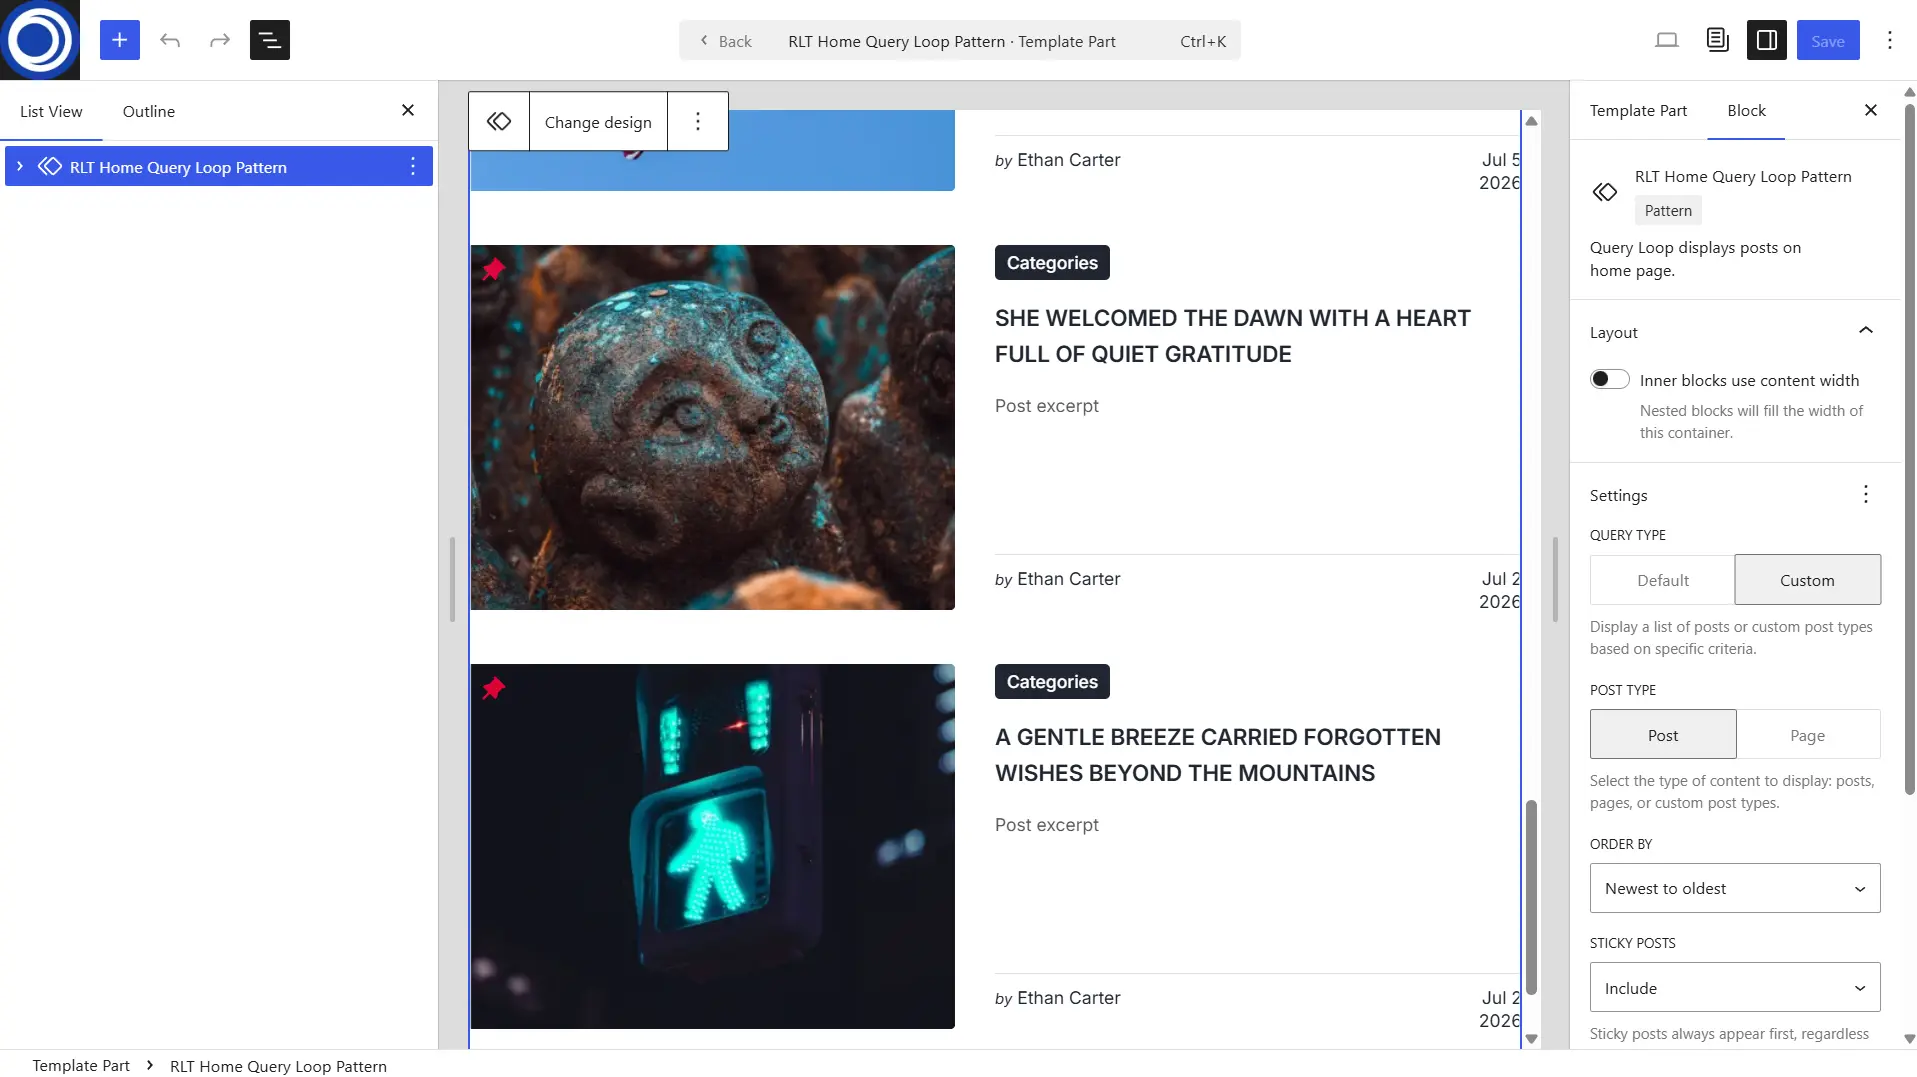
If you want to customize the main post listing on the homepage, edit the RLT Home Query Loop Pattern. In the pattern editor, modify the settings of the Query Loop block to suit your needs. For example, you can change the sorting order, display posts from a specific category or other taxonomy, adjust the number of posts displayed, or configure other available query options.
Changing Share Links (RLT Share Links Block)
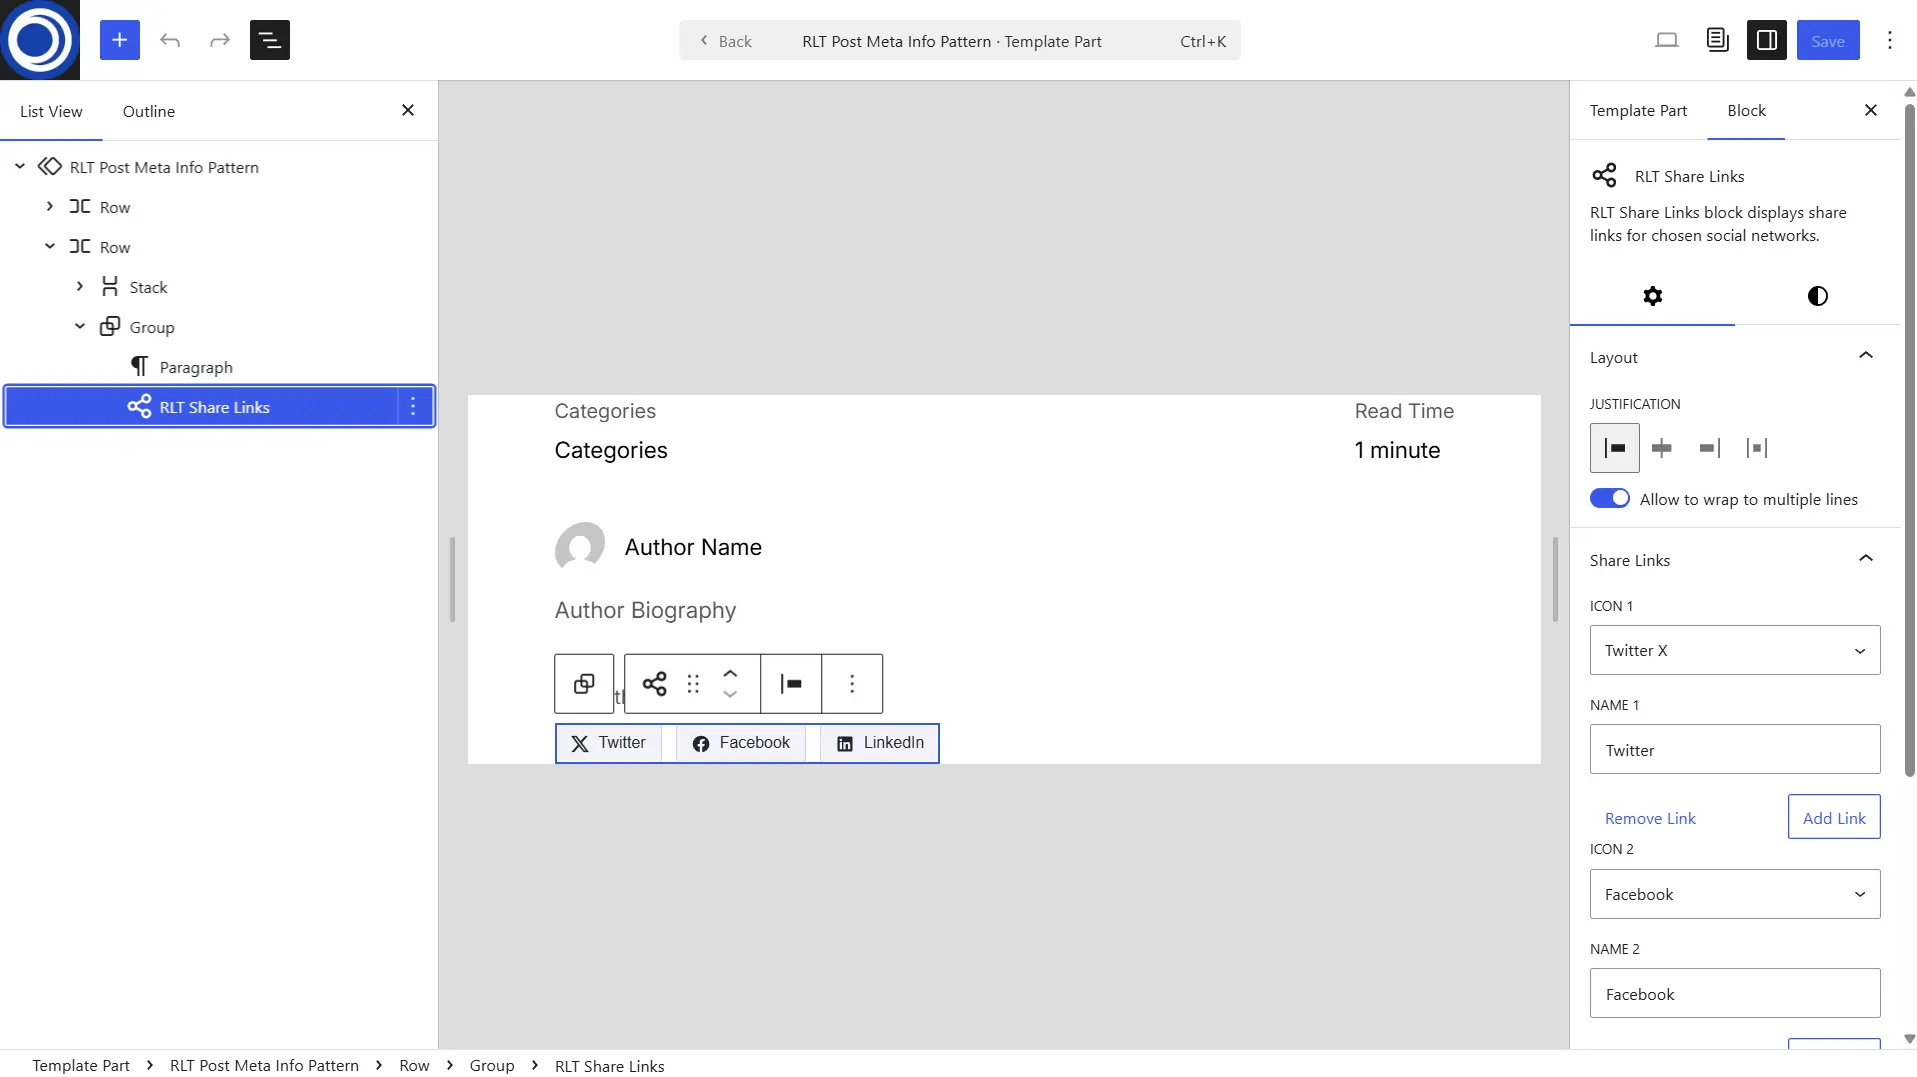
You can customize the RLT Share Links block in the RLT Post Meta Info Pattern. Open the pattern in the Site Editor, select the RLT Share Links block, and use the block settings in the right sidebar to add, remove, or reorder social sharing links. For each item, choose the desired social network and the corresponding icon from the available dropdown lists, then save your changes.
Category Icons
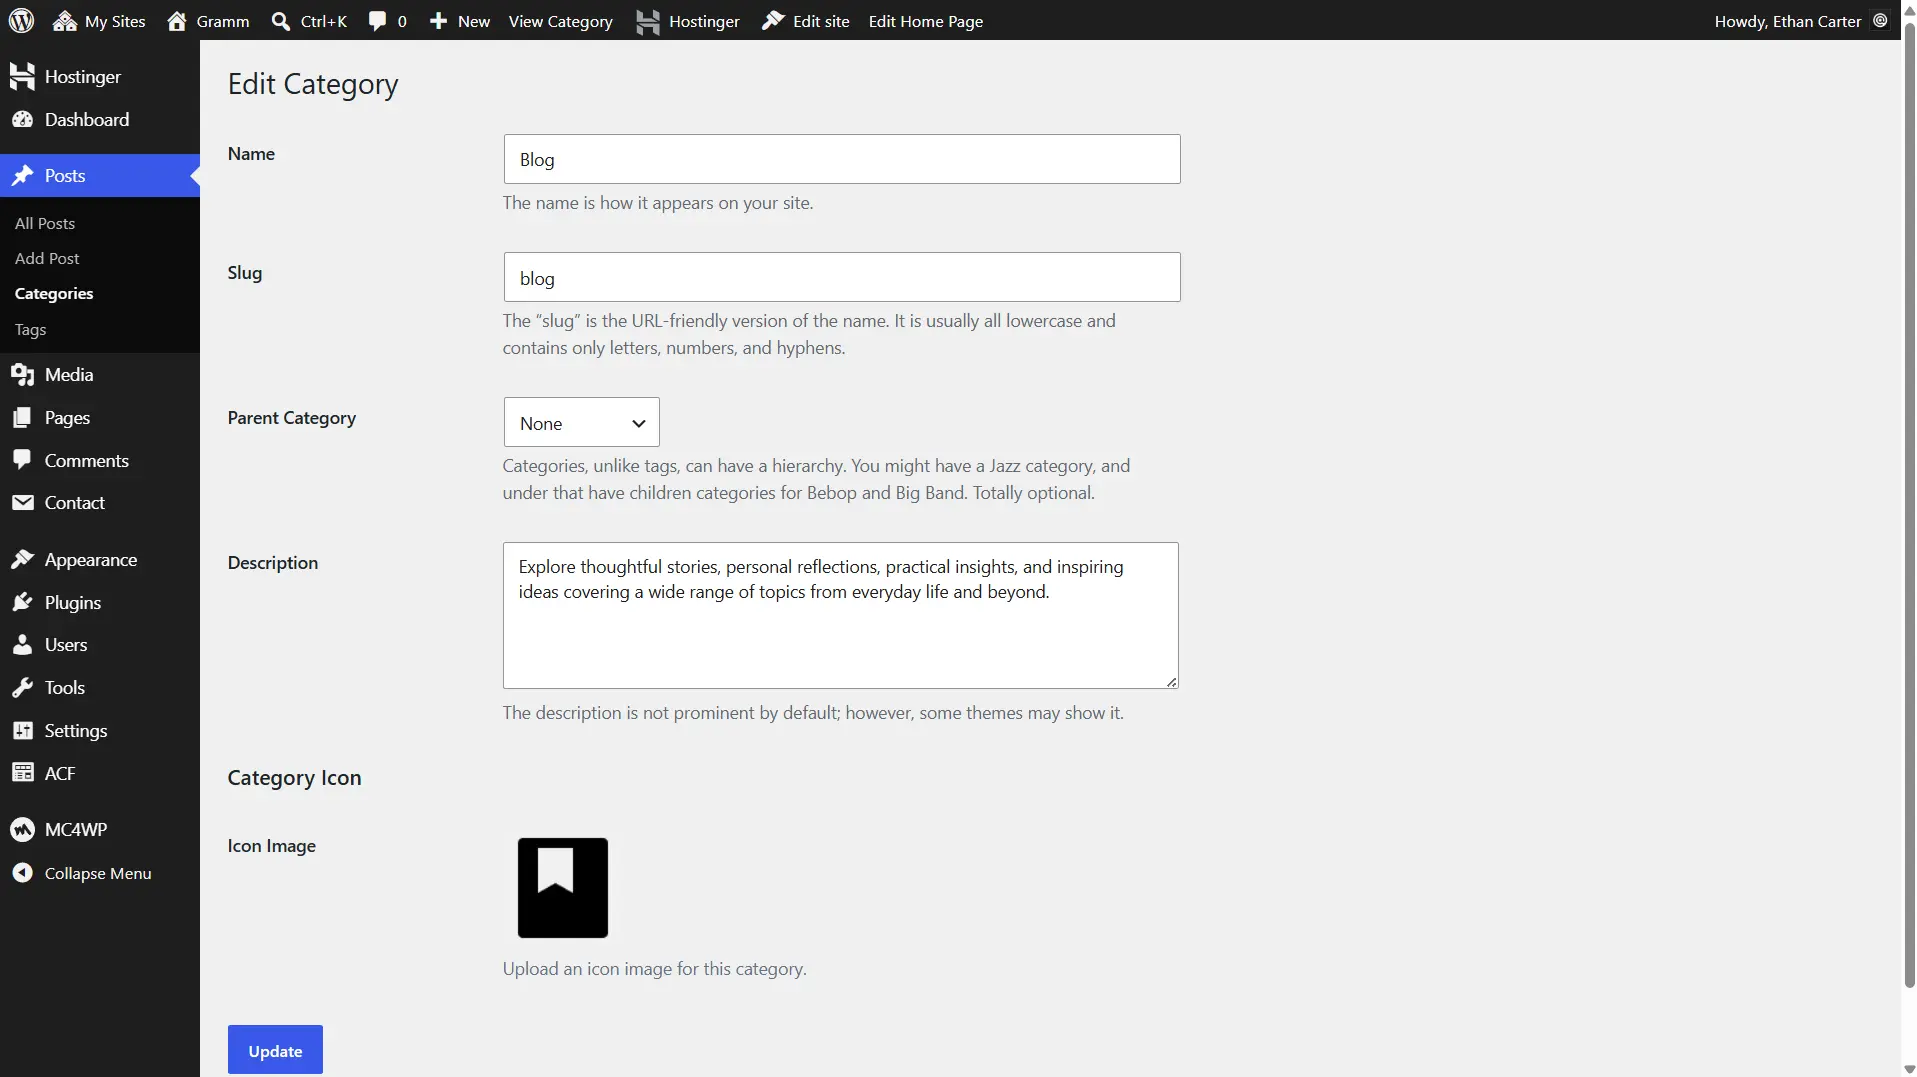
The Gramm theme allows you to assign a custom icon to each post category. To add or edit a category icon, navigate to Posts → Categories, then create a new category or edit an existing one. In the Icon Image field, upload a 96 × 96 px icon. The icon color does not matter, as it will be automatically styled by the theme. For best results, use a simple monochrome image in PNG format. A recommended resource for finding suitable icons is Remix Icon.
Subscription Form
The subscription form is powered by the MC4WP: Mailchimp for WordPress plugin. If you have installed this optional plugin, a corresponding MC4WP menu will appear in the WordPress admin dashboard. To connect the plugin to your Mailchimp account, navigate to MC4WP → Mailchimp and enter your Mailchimp API key.
Next, open the form settings MC4WP → Form → Settings and navigate to Mailchimp specific settings. Under Audiences this form subscribes to, select the audience you want the form to subscribe users to from the available list, then save your changes.
For more information about the Mailchimp service, visit https://mailchimp.com/. Please configure the plugin according to the instructions provided by its author https://www.mc4wp.com/.
To create the subscription form, navigate to MC4WP → Forms, paste the following HTML code into the form editor, and save your changes (see Picture 1):
<div class="rlt-subscribe-form"><div class="rlt-subscribe-field"><label for="email" class="rlt-subscribe-label"><span class="screen-reader-text">Email address</span><input type="email" id="email" name="EMAIL" class="rlt-subscribe-input" placeholder="Your email address" autocomplete="email" required /></label><input type="submit" value="Sign up" class="rlt-subscribe-button" /></div></div>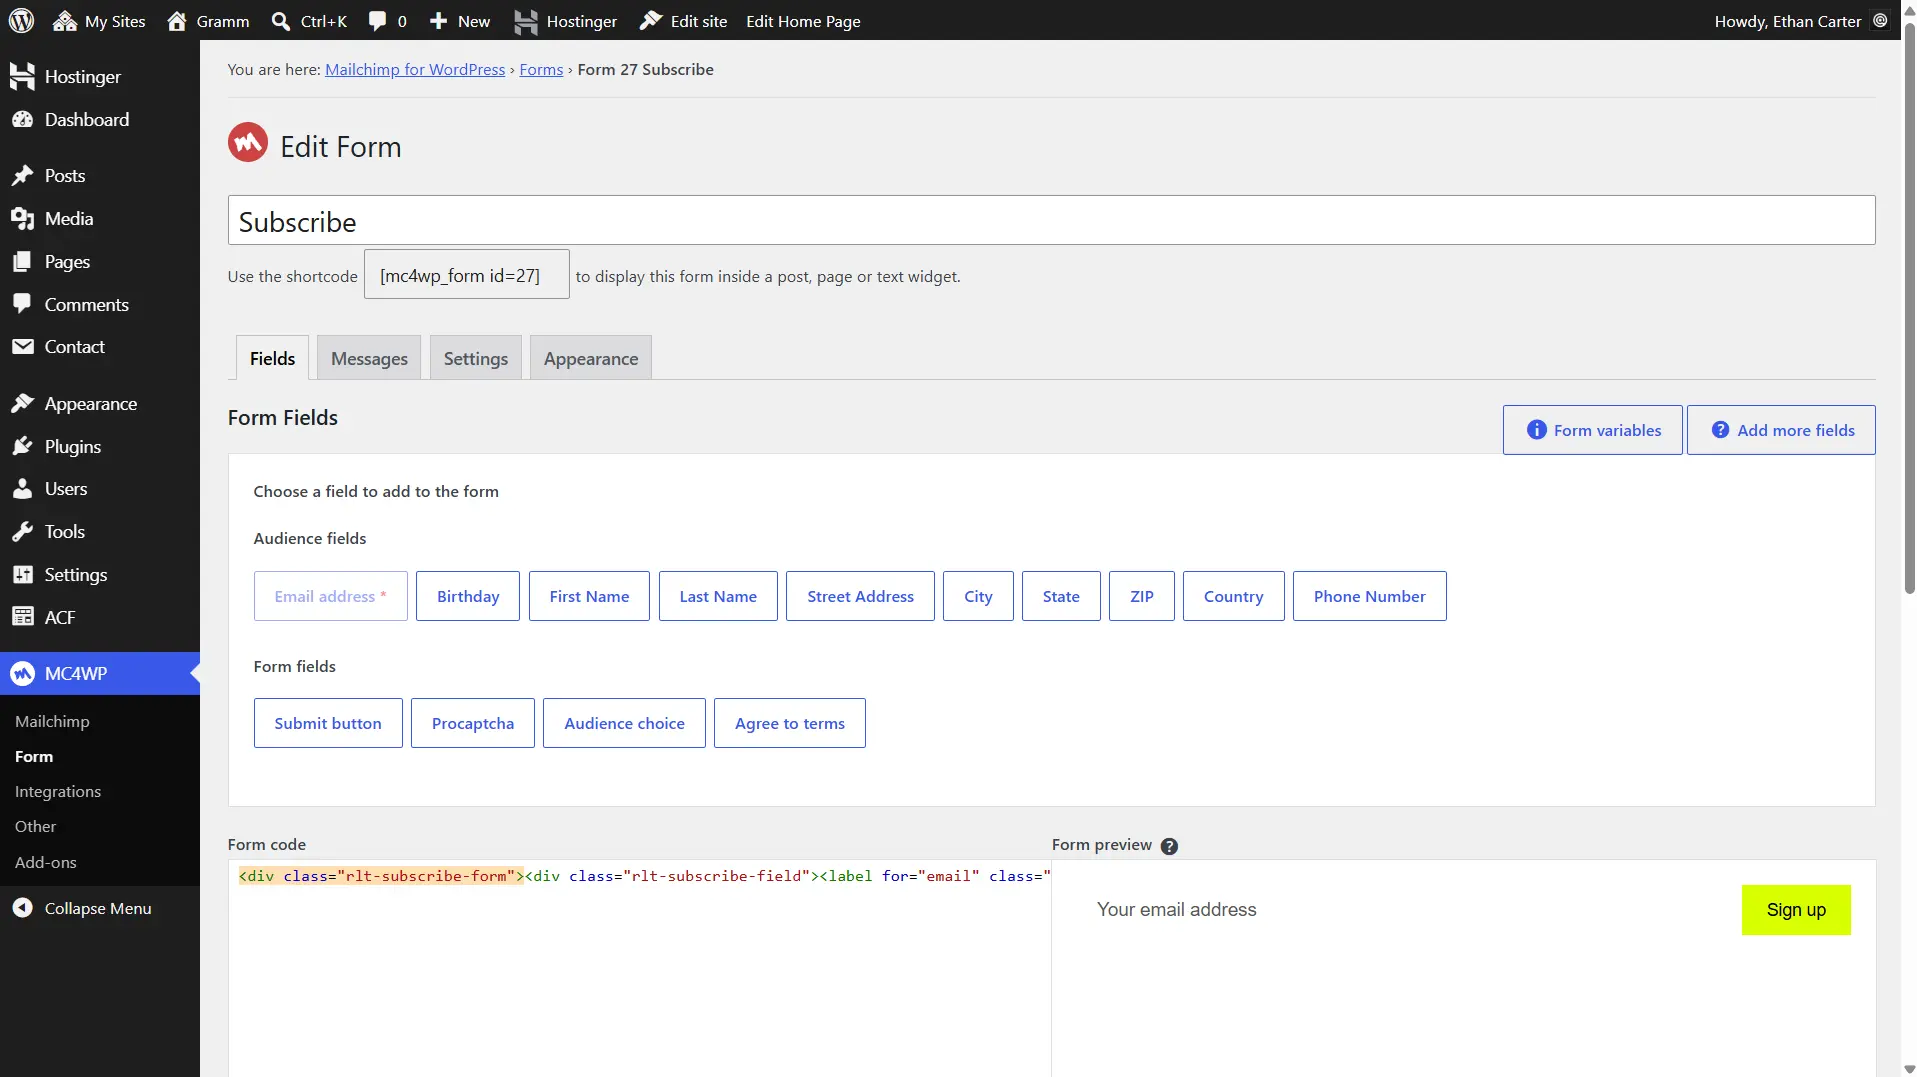
Contact Form
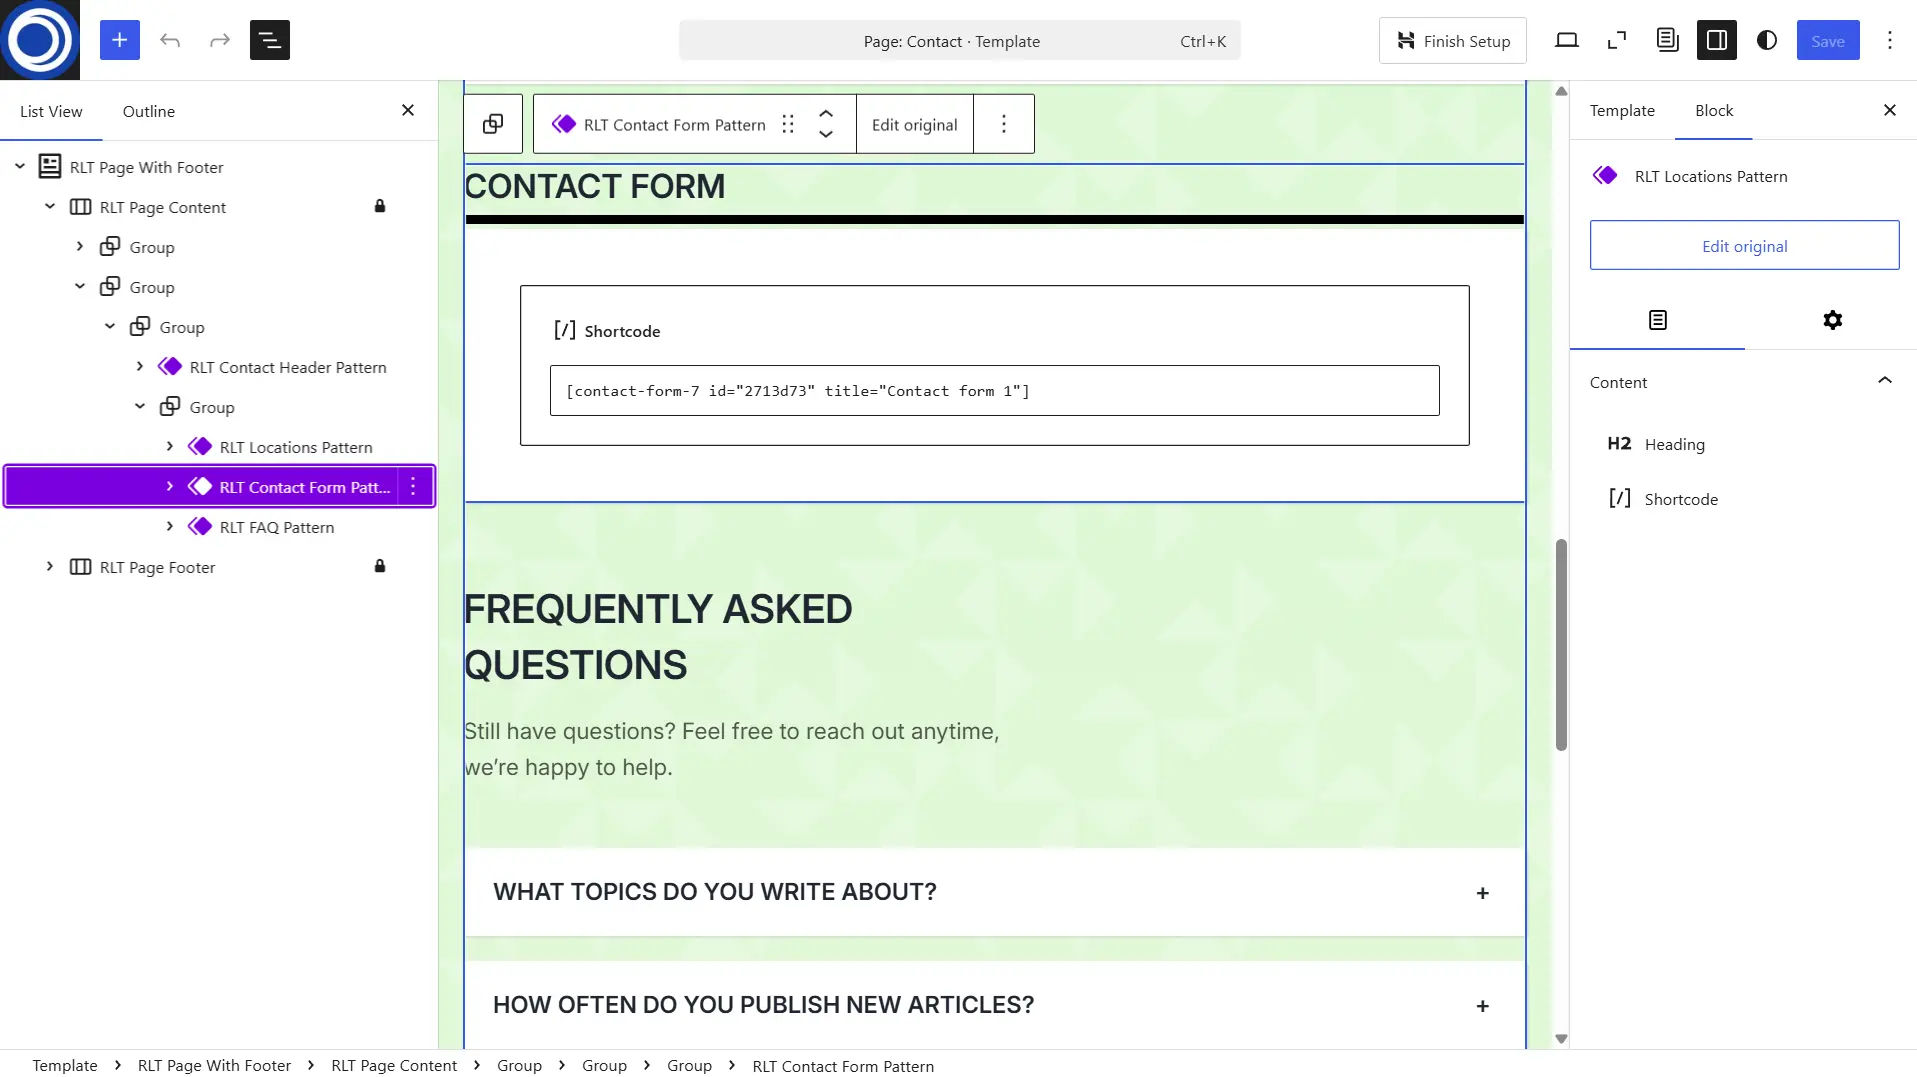
The contact form is powered by the Contact Form 7 plugin. If you have installed this optional plugin, navigate to Contact → Contact Forms in the WordPress admin dashboard and open the contact form you want to use. Replace the default form markup with the HTML code provided below, then click Save to apply your changes. You can further customize the form and configure its email settings using the options available in the Mail and Settings tabs.
Use the following HTML code to create a styled contact form that matches the design of the Contact page included with the theme:
<div class="rlt-contact-form"><label class="rlt-contact-form-label">Your Name [text* your-name class:rlt-contact-form-input autocomplete:name]</label><label class="rlt-contact-form-label">Your Email [email* your-email class:rlt-contact-form-input autocomplete:email]</label><label class="rlt-contact-form-label">Subject [text* your-subject class:rlt-contact-form-input]</label><label class="rlt-contact-form-label">Your Message (Optional) [textarea your-message class:rlt-contact-form-textarea]</label>[submit class:rlt-contact-form-submit "Send Message"]</div>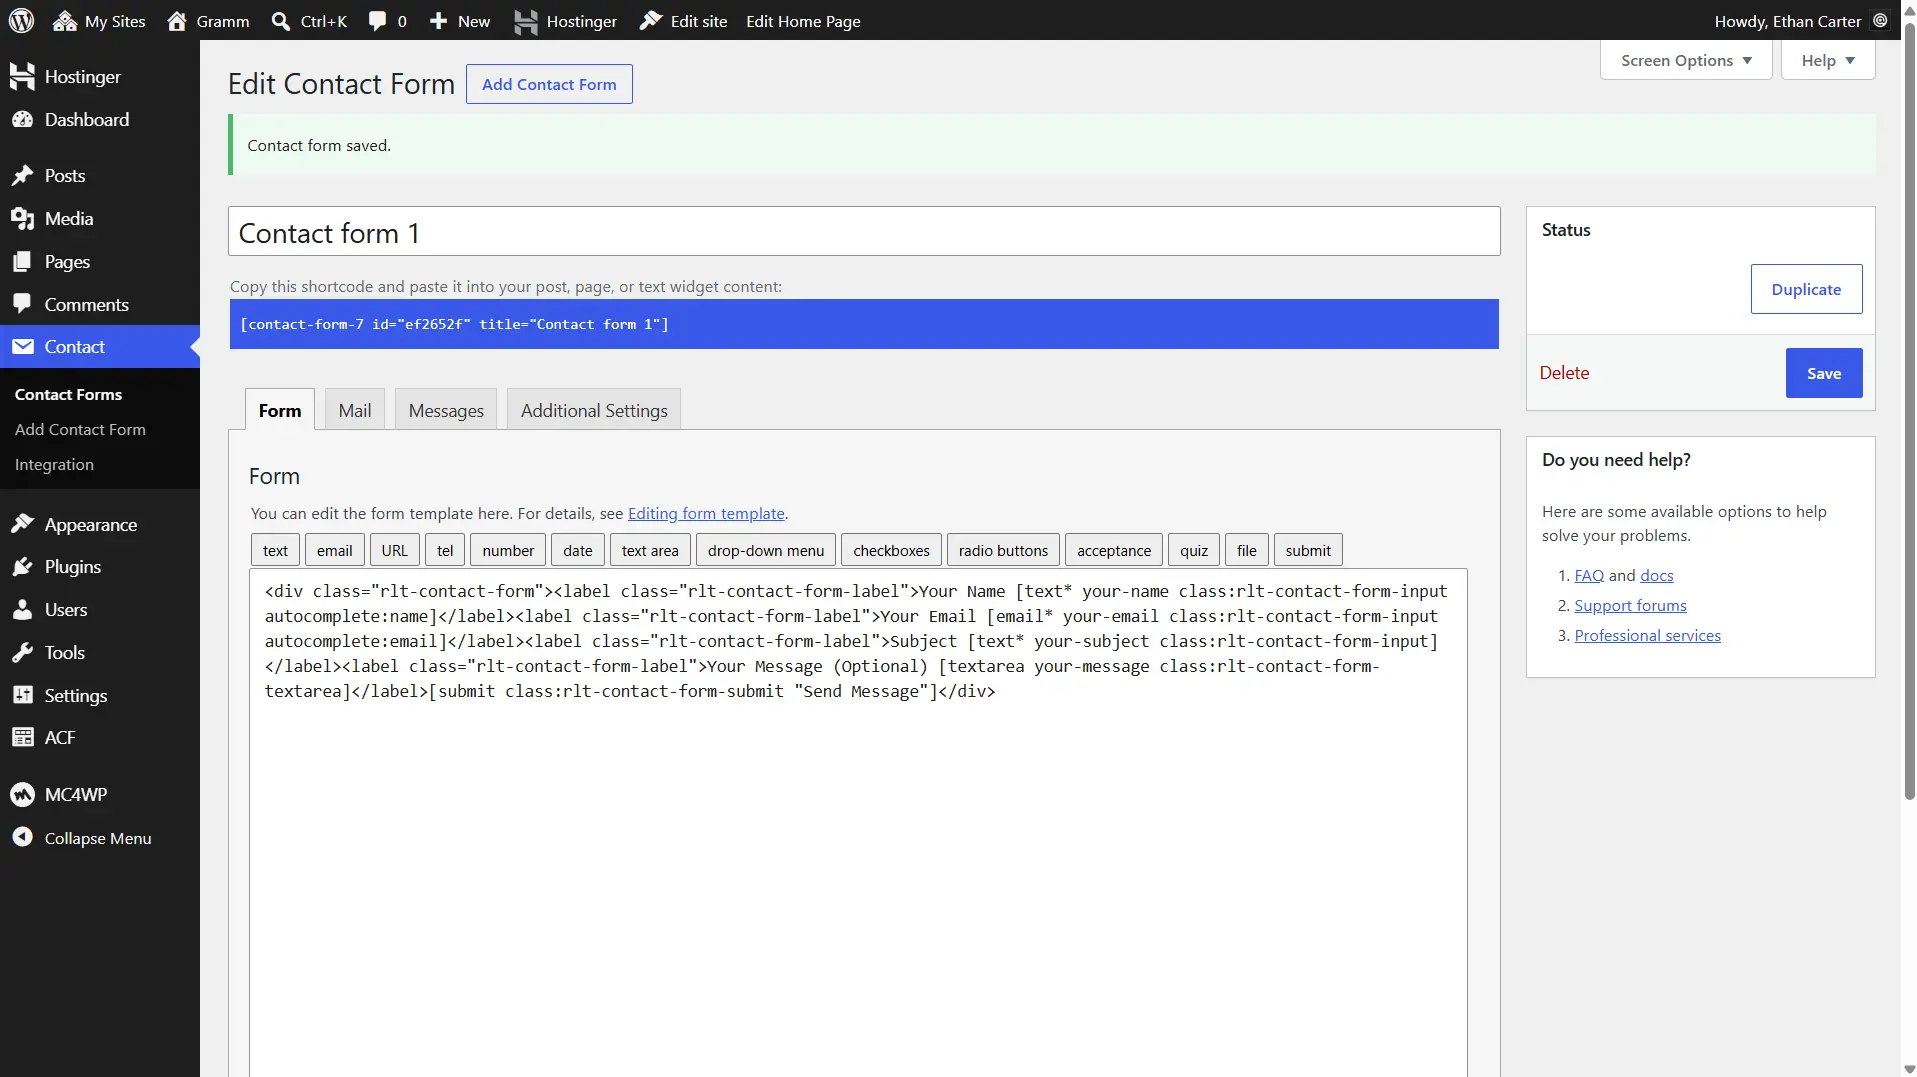
Useful tips
SVG Uploads
It is not allowed themes to enable SVG uploads as it raises security concerns due to the possibility of attackers executing malicious code through SVG's XML. For this reason, this feature is not enabled by default in my theme. However, you can use third-party plugins such as Safe SVG (https://wordpress.org/plugins/safe-svg/) to enable this feature.
After installing and activating these plugins, you will be able to upload and use vector SVG graphics as a site logo, for example, or in other scenarios.
Fix Permalinks and 404 Errors
How to reset WordPress permalinks to fix 404 errors
-
Log in to your WordPress dashboard.
-
Navigate to Settings > Permalinks in the left-hand menu.
-
Choose a different permalink structure under Permalink Settings and click Save Changes.
-
Switch back to your original permalink structure and click Save Changes again. This should help resolve the 404 issue.
After completing these steps, the 404 error should no longer appear, and your site's URLs will follow the selected permalink format.
Changelog
v1.0.0
- Initial release
Credits
Demo site uses the following icon set:
Hugeicons Pro - Free Version
Remixicon
Image Notice: The images shown in the live demo are provided for demonstration purposes only and are not included in the theme download package. All demo images are sourced from Pexels and Magnific. To achieve the same appearance as the demo site, you will need to replace the placeholder images with your own content or obtain the original images from their respective sources, subject to their licensing terms.